Personalized Address Sign
Create A Personalized House Address Sign
Color coordinate with your house, or add a meaningful image.
Mt. Rainier pattern provided
Disclosure: This site contains affiliate links. As an Amazon Associate, I earn from qualifying purchases. Clicking on links, and purchasing products, may result in the seller paying us compensation. Affiliate links are in green.
Also see:
lifestyle blog
Craft Projects
Yard & Exterior Projects
Wood Craft Projects
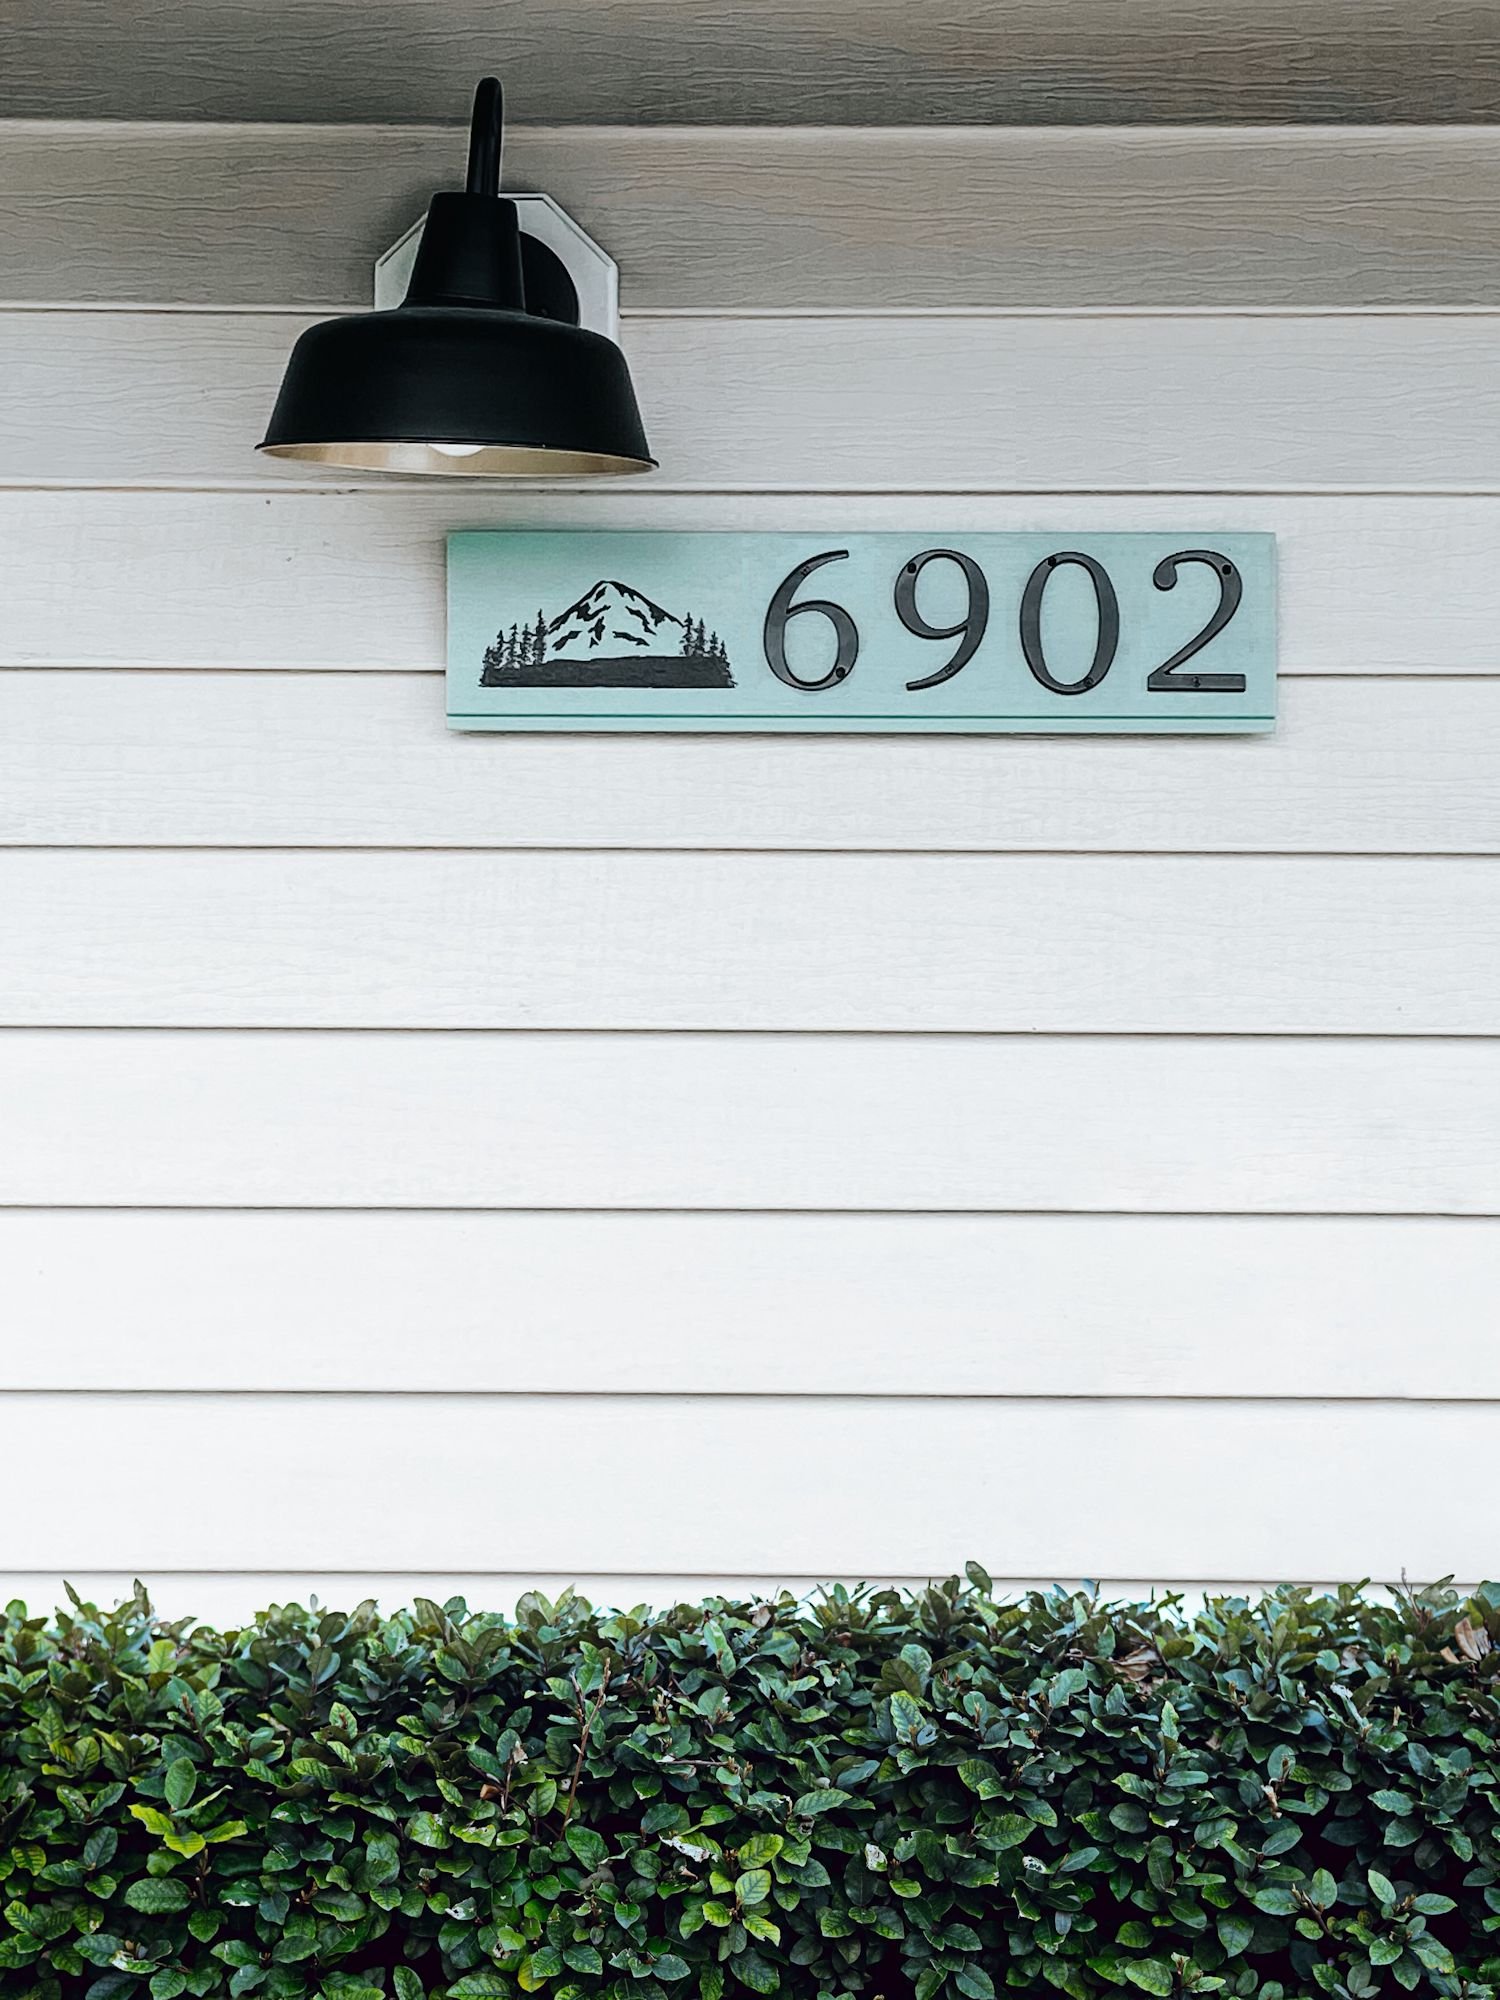
When we first saw our little “Northwest Cottage”, I noticed a personalized address sign on the garage. I liked it, but it had the previous owner’s name on it. That would not do for us, of course. By the time the house sale had gone through, the address sign had been removed.
After living in the house for 2 years, and completing all the other remodeling that took priority, we decided it was time to create a new address sign.
We live near Mount Rainier, and my husband and I love spending time on the mountain. We decided to create a sign that featured our favorite place.

Address Sign Size
Your size will depend on the quantity of numbers you have in your address, and the size of image you wish to add.
SUPPLIES
Check Amazon for prices. Affiliate links are green.
Mountain Pattern - click to download our free pattern
Draw your own pattern, or print our pdf file. Enlarge or shrink as needed. You are free to use our pattern for your own personal use.
Wood Board (for image and address)
We were able to use a piece of shiplap from our Install Shiplap Project. Always keep left-over supplies - they can come in handy for future projects.
Paint (board)
The shiplap was already primed. We painted the board in the same exterior paint we had painted the front door. Our address sign coordinated with our front door colors. See our Front Door Makeover Project.
Paint (mountain scene)
I had planned to use the same exterior paint that I had used on the house trim, but it didn’t work well for the detailed scene. I switched to my acrylic artist paint. Grumbacher and Liquetex are a couple of my favorite brands. Use any decent quality artist acrylic paint. Craft paint would probably work as well.
Cup Of Water / Paper Towel / Palette or Foam Plate
Water is needed if using acrylic paint to paint your graphic. I placed a dab of paint onto a foam plate. Paper towel is used for cleaning up excess water. Go to: Art Projects for more information on painting.
Ruler, Pencil, Tape
I used my large sewing ruler. I LOVE that ruler - I use it for most projects.
Carbon Paper - optional
Use carbon paper to transfer the design onto the board. If you prefer, you can free-hand draw your design.
General paint supplies paint brush for painting the board, painter's tape, and other basics
Artist brushes smaller detail brushes for painting the mountain scene
Sand Paper to sand off rust as needed
Screw driver and screws for installing numbers onto board

INSTRUCTIONS
Choose Location
We decided to hang our sign on the garage, under the light.
Determine Height & Length
We had already decided to use a left-over piece of shiplap. We held it up to the garage to ensure the height of the shiplap would work.
We computed the length of the board only AFTER we had the numbers. We chose numbers in a size that fit the height of the board.
Transfer & Paint Design
I used carbon paper to transfer my pattern onto my board. You could also free-hand copy.
1. Prepare Board
Sand and prime your board if needed. Paint your board, using exterior paint.
2. Test Image Size
Lay out your numbers. Lay a piece of paper onto the board that is the approximate size of your image to be sure you are happy with that size. My image was approximately 4” x 6.5”.
NOTE: It’s a good idea to also mark the screw holes at this point. They could get moved while working with the sketching. OR go ahead and install the numbers at this point.

3. Transfer Design To Board
Use a ruler to ensure that the image is aligned with the numbers in the way you want. I aligned the bottom edges. I then ran tape across at that level.
4. Paint Your Design
Remove the carbon paper and pattern. Leave the tape in place. Using acrylic paint and small round brush, paint on your design.
Remove tape when the design is completed.

Screw On Numbers
If you have not done so already, screw the numbers to the board. We actually waited to this stage before attaching the numbers, just in case we wanted to place them differently after the image was completed.
Hang Your Address Sign
Our garage siding still had the screws from the previous owner’s sign. We added hooks to the back of our sign, and hung it in the previous sign’s place.
Enjoy your beautiful new sign!

Create a color coordinated front door! We transformed the front of our house by simply painting the front door.
We used the same paint on our address sign as we did on the front door.
Exterior Projects


Protect your wood deck from the elements with proper prep and quality stain. Proper maintenance enhances the life span of a wood deck. Protect from snow, rain, freezing ice, hot sun.