End Table

End Table - made from wood round
Super easy 3 legged end table
Wood rounds and “hairpin legs” create a beautiful table with a rustic design.
Finish it with polyurethane for a durable coating. My Norwegian grandfather always made tables with 3 legs - no worries about tipping tables due to a leg being too short or too long. Very clever!
If you are using 4 legs, and need to make a slight adjustment for one leg, check out our table project.
Also see:
Blog: tips from the workroom & trails
Crafts
Home Improvement
Easy DIY Furniture
We needed new end tables, and I wanted them to have a rustic look, yet be durable and easy to clean. I wanted a minimalist design.
My daughter had seen tables made from wood rounds, and realized we could make them ourselves. This was a joint venture as a family project.

Choose Your Wood
After looking through stacks of wood rounds, we found just the right two for my tables.
Disclosure: This site contains affiliate links. As an Amazon Associate, I earn from qualifying purchases. Clicking on links, and purchasing products, may result in the seller paying us compensation - at no extra cost to you. Affiliate links are in green.
SUPPLIES
Refer to images below
Wood Round
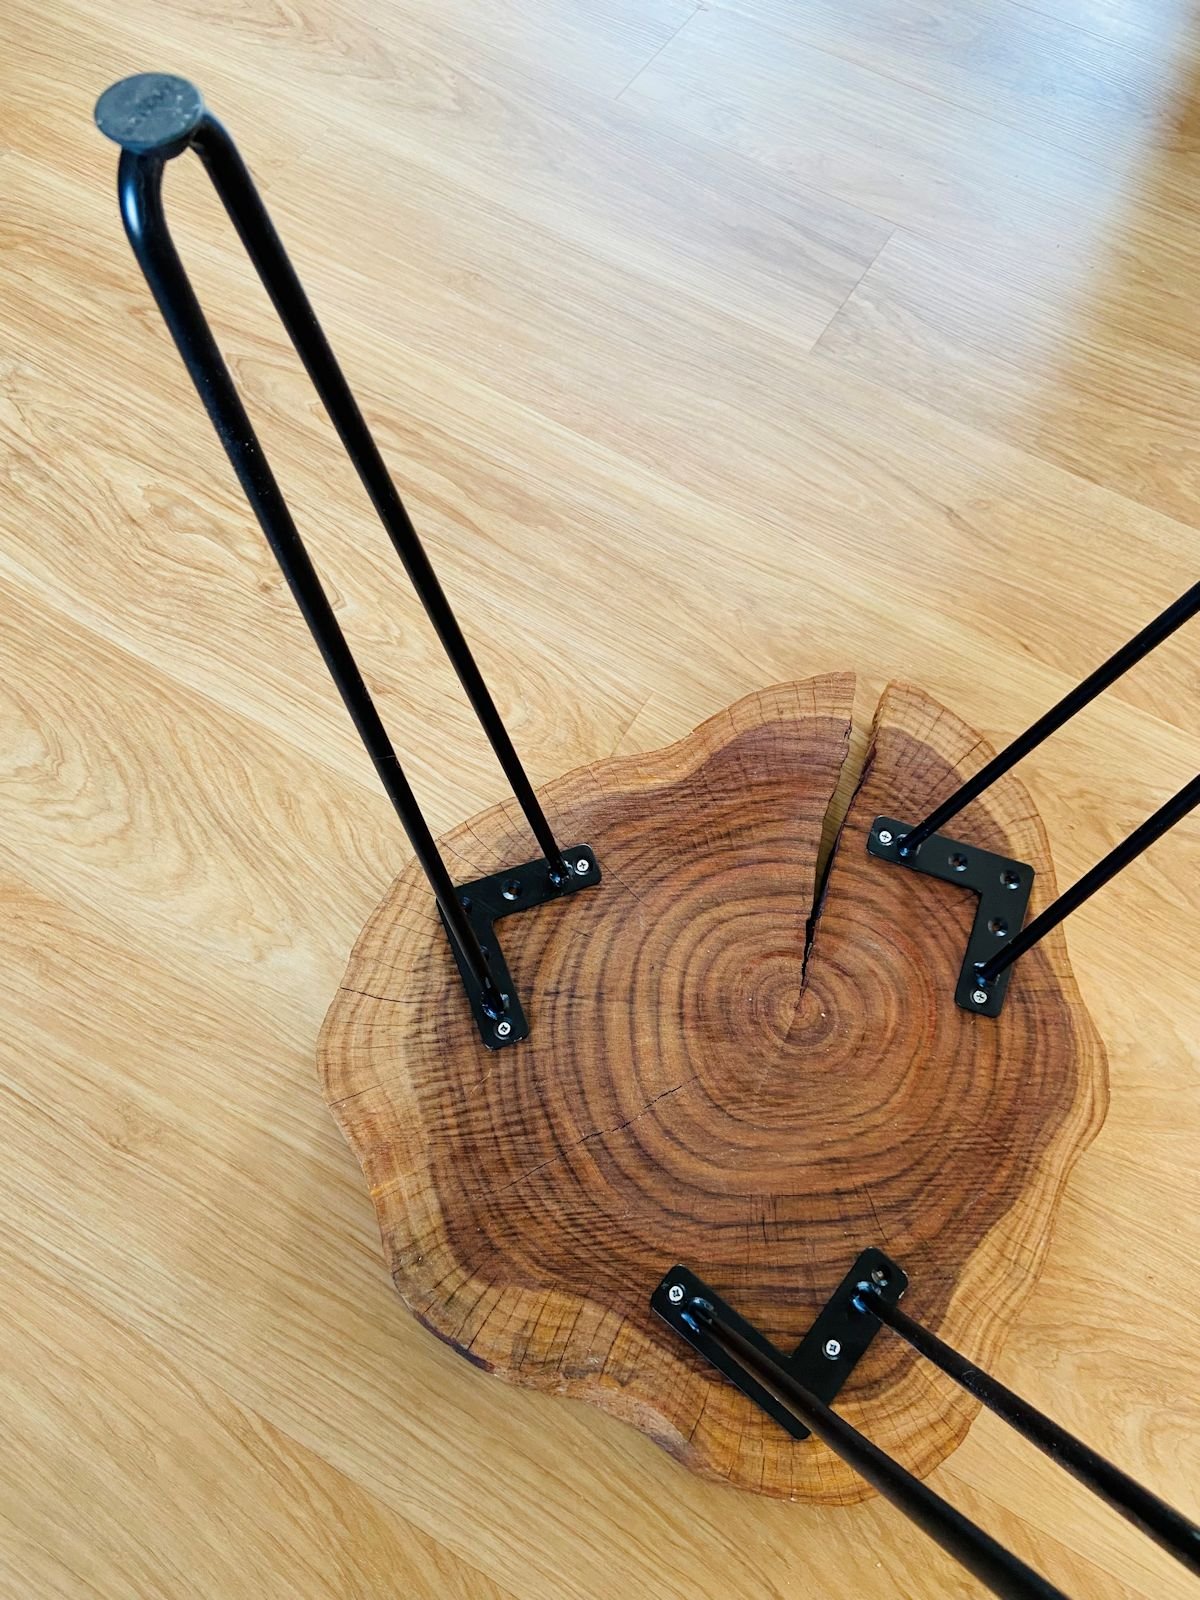
Look for a piece that has a nice flat surface. They are all very different in shape - we were mostly looking for pieces that had an interesting feature, such as a crack, yet made sense as a table. Too large of a crack would not work well - the table might split at a future time, and it would not have enough usable surface area. Think about what you will be using the table for. Since we were using 3 legs, we chose a somewhat triangle shape.
They are called “hairpin” due to their shape.
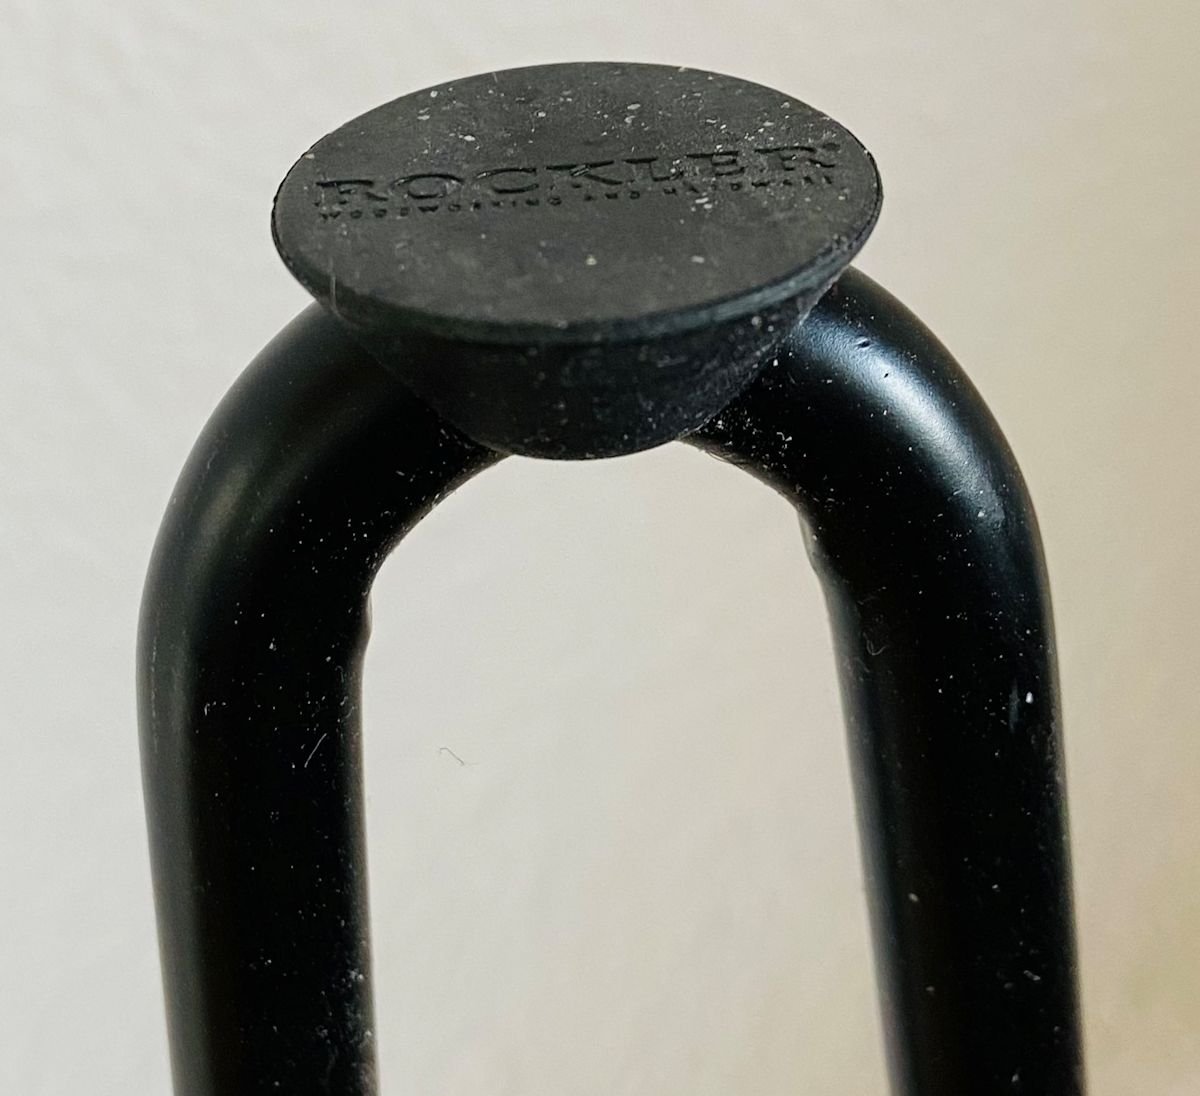
Floor Protectors
Floor protectors are small rubber pieces that fit onto the bottom of each leg.
Gel polyurethane
The polyurethane provides a protective coating.
SAFETY NOTICE
REMEMBER TO FOLLOW ALL DIRECTIONS AND SAFETY PRECAUTIONS listed on product labels. Work in a well ventilated area. Use a dust mask and eye protection for all cleaning and sanding. Use gloves when using cleaners such as TSP. We did not use that for this project, but I often use it to clean walls before painting.

Protective Coating
We chose satin because I wanted a natural looking finish (rather than a gloss finish). It was also clear, so didn’t change the color of the wood.
Tools
Screw driver, paint brush, sand paper - that’s it!
INSTRUCTIONS
Remove The Outer Bark
Most of the bark had already peeled off of our piece, but there were areas with bark still attached. It must be removed because it will eventually peel off.
Clean The Wood
Clean and dry the piece of wood. I used a vacuum (with the brush attachment) to clean off dust and loose pieces. Gently wipe clean with a damp cloth. Sand any rough areas to the degree of finish you you desire. We left our piece slightly rough to the touch for a more natural look and feel. We were not going for a highly polished finish.
Sand The Wood
Sand any rough areas to the degree of finish you desire. We left our piece just slightly rough to the touch for a more natural look and feel. We were not going for a highly polished finish.
Use a tack cloth to remove wood dust caused from sanding.
Choose Top & Bottom
Decide which side will be the top, and which side will be the bottom. You might find one side to be slightly nicer than the other. Perhaps the color is better, or the surface is nicer. Once decided, sand the top further as necessary, and clean it again.
Apply Polyurethane
Following directions on the can, apply the polyurethane to both the top, bottom, and sides of the wood piece. The top is especially important, because it will be used to hold objects, and is more at risk of getting wet (I use my end table to hold my coffee in the mornings).
Attach Legs & Protectors
We attached 3 legs to each of our two tables. Decide where you wish to place the legs. Turn your piece over, and attach the legs to the underside of the wood piece (bottom of the table). The bracket for each leg is attached with screws.
Attach a floor protector to the base of each leg. The type we chose easily slipped onto the end of the leg.


Coffee Table
While looking for wood rounds, our eyes caught some beautiful pieces that were perfect for use as a coffee table. That project is coming!
Furniture Projects


Rustic wood bar made from wood pallets. Quick and easy.