Tissue Box Cover

DIY Projects -> sewing -> sew decor
One of our oldest, and most popular, patterns.
originally on our previous site: CraftAndFabricLinks.com
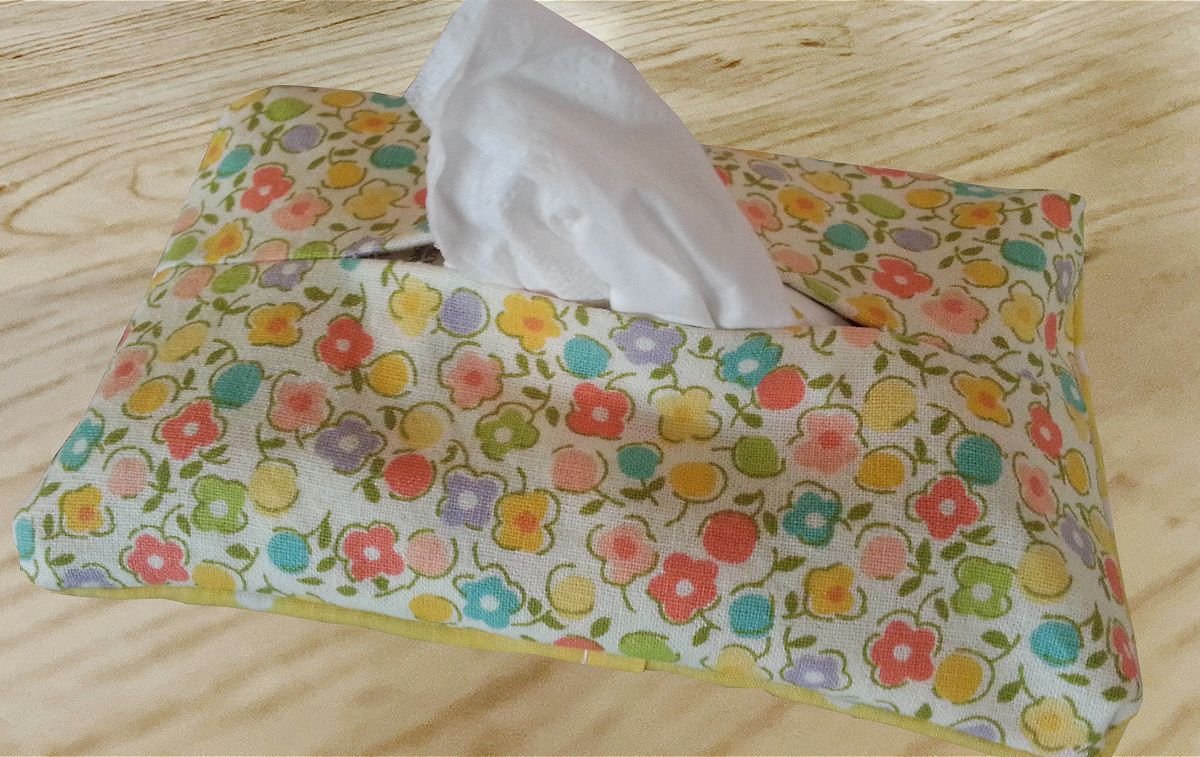
Tissue Box Cover
Change up fabric for baby’s room, holiday, or any occasion. Custom fit to your box size. The opening is nicely finished and topstitched, and the tissue box cover is fully lined.
Disclosure: This site contains affiliate links. As an Amazon Associate, I earn from qualifying purchases. Clicking on links, and purchasing products, may result in the seller paying us compensation - at no extra cost to you. Affiliate links are in green.
Great “beginner” sewing project. Practice straight stitching.
Also see:
Notes From The Workroom & Trail
Home Improvement Projects
Furniture Projects
Craft Projects
Fully Lined Tissue Box Cover
This is an extremely easy pattern, and works well for any simple box that needs an opening on top, such as tissue box. Omit the steps for creating the top opening, and this method can be used to make a toaster or appliance cover. All patterns, images and text © Christina Sherrod of CraftAndFabricLinks.com unless otherwise noted.
Cover Size
Customize for your needs.
Soft Sides
This project uses Fusible Fleece or Craft Fuse. Fusible fleece provides nice padding. Craft Fuse provides a stiffness to the sides. Visit my Amazon store page to purchase fusible fleece, insul-bright, heat resistant cloth, quilting pins, and other items I use in my projects.
SUPPLIES
Adjust amounts for your project - these amounts were for my tissue box size.
Project Supplies
Enough fabric to cover your particular box. For the larger size, use 1/2 yard. For a small Puffs box, a fat quarter is enough.
1/2 yard lining fabric for large box; 1 fat quarter lining for small box
fusible fleece or Craft Fuse (to stiffen sides): you need a piece large enough to cover the two ends and two sides. In the diagram above you would need two pieces measuring 5.6" x 5.1", and two pieces measuring 5.6" x 10".
Thread (to match background)
Ribbon or lace, etc. for trim
General Sewing Supplies
sewing scissors
quilting pins
large sewing ruler
fabric marking pencils
seam ripper
rotary cutter and mat (optional but nice)
Safety Reminders For Little Helpers
A. Always have an adult do all the ironing!
B. Never run with scissors. Carry them pointed end down.
C. Never use a sewing machine without adult supervision.
D. Always let an adult use the seam ripper for you.
Now you are ready to start!
Please Note: These diagrams are not exactly to scale, but pattern pieces do fit as shown.
DIRECTIONS
use 1/4" seam allowance
Iron between each step. Read through all directions completely before beginning.
1. Create Pattern Piece
First, measure your box. Write down length, width and height.
Next, determine the size of your pattern piece. Using the measurements you wrote down, do the following:
Add 1/2 inch to every measurement (to accomodate the 1/4" seam on each end).
Using your new measurements, draw your pattern piece. Refer to the following diagrams. For example, my length dimension was 9.5"; therefore I drew my pattern length to be 10". I use freezer paper, bought on a roll, to draw my patterns onto. It is nice, sturdy paper.

NOTE: The above diagram was for a box I made that was the longer, rectangle type.
I also made a cover for a Puffs tissue box. That project is what I used in the following photos.
2. Attach Fusible Fleece or Craft Fuse
The fusible fleece or craft fuse provides stability to the sides of the box. I also use fusible fleece for my Kitchenaid Appliance Cover.
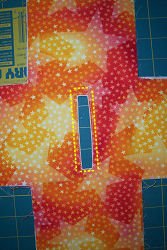
Lay out your pattern piece with the grain or against the grain on your fabric - it doesn't really matter for a tissue box. In other words, lay the pattern in either direction on the fabric. Use your pattern to cut out the outer fabric piece and the lining piece. Cut craft fuse (or interfacing) for the two ends and the two sides. You do not need it for the top. Refer to the photos below.
Iron the Craft Fuse (or fusible fleece) to the sides and ends of the wrong side of the outer fabric.
3. Stitch Lining To Outer Fabric & Create Opening
Pin the outer fabric to the lining, right sides together.
If you are making a box that has an opening in the top (such as a tissue box cover), proceed through steps a to d below. If there will be no opening in the top (such as a toaster cover), proceed to step four.
a. Draw a line the length you want the opening to be. For my small Puffs box, I drew the line 3" long.

draw 3” line
b. Stitch a rectangle 1/4" from the line.
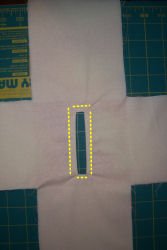
c. Cut a straight line through all layers, following the drawn line. Make a "Y" from the each end of the line out to the corners. Be careful not to snip through the stitching.

d. Turn the cover right side out; topstitch (i.e. use a slightly longer stitch length) around the opening, about 1/8" from the edge. Press. I highlighted the stitching in yellow.
4. Stitch Sides
You now have 4 side pieces of top fabric, and 4 side pieces of lining fabric (the 4 “box sides”) that are still unstitched.
Stitch the lining side edges together, right sides together. Remember that the lining seams should be facing the wrong side of the outer fabric. The stitching is enhanced in blue in the following photo.
NOTE: Only the SIDE EDGES of the sides are stitched together. The lower edge is left unfinished. You are creating the “box” at this point.

Repeat with the outer fabric.
Tuck the lining down inside the cover. Turn cover right side out.

5. Test The Size
Turn the cover upside down and place the tissue box into it to check the fit.

6. Hem Or Bind The Lower Edge
Turn under the lining hem and the outer fabric hem so that the hems are inside the two layers and do not show (hems are folded toward one another). Pin. Remove the box and topstitch around the bottom edge, sitiching the layers together.
Alternative: trim the lower edge with seam binding. For instructions, go to: Assemble & Bind A Quilt.

Sewing Lessons
learn a new skill with each project


Lifestyle Blog


Set of 4 gift bags from one yard of fabric. Accessory or gift. 3 sizes plus a wine bag. Super easy - beginning sewing project.