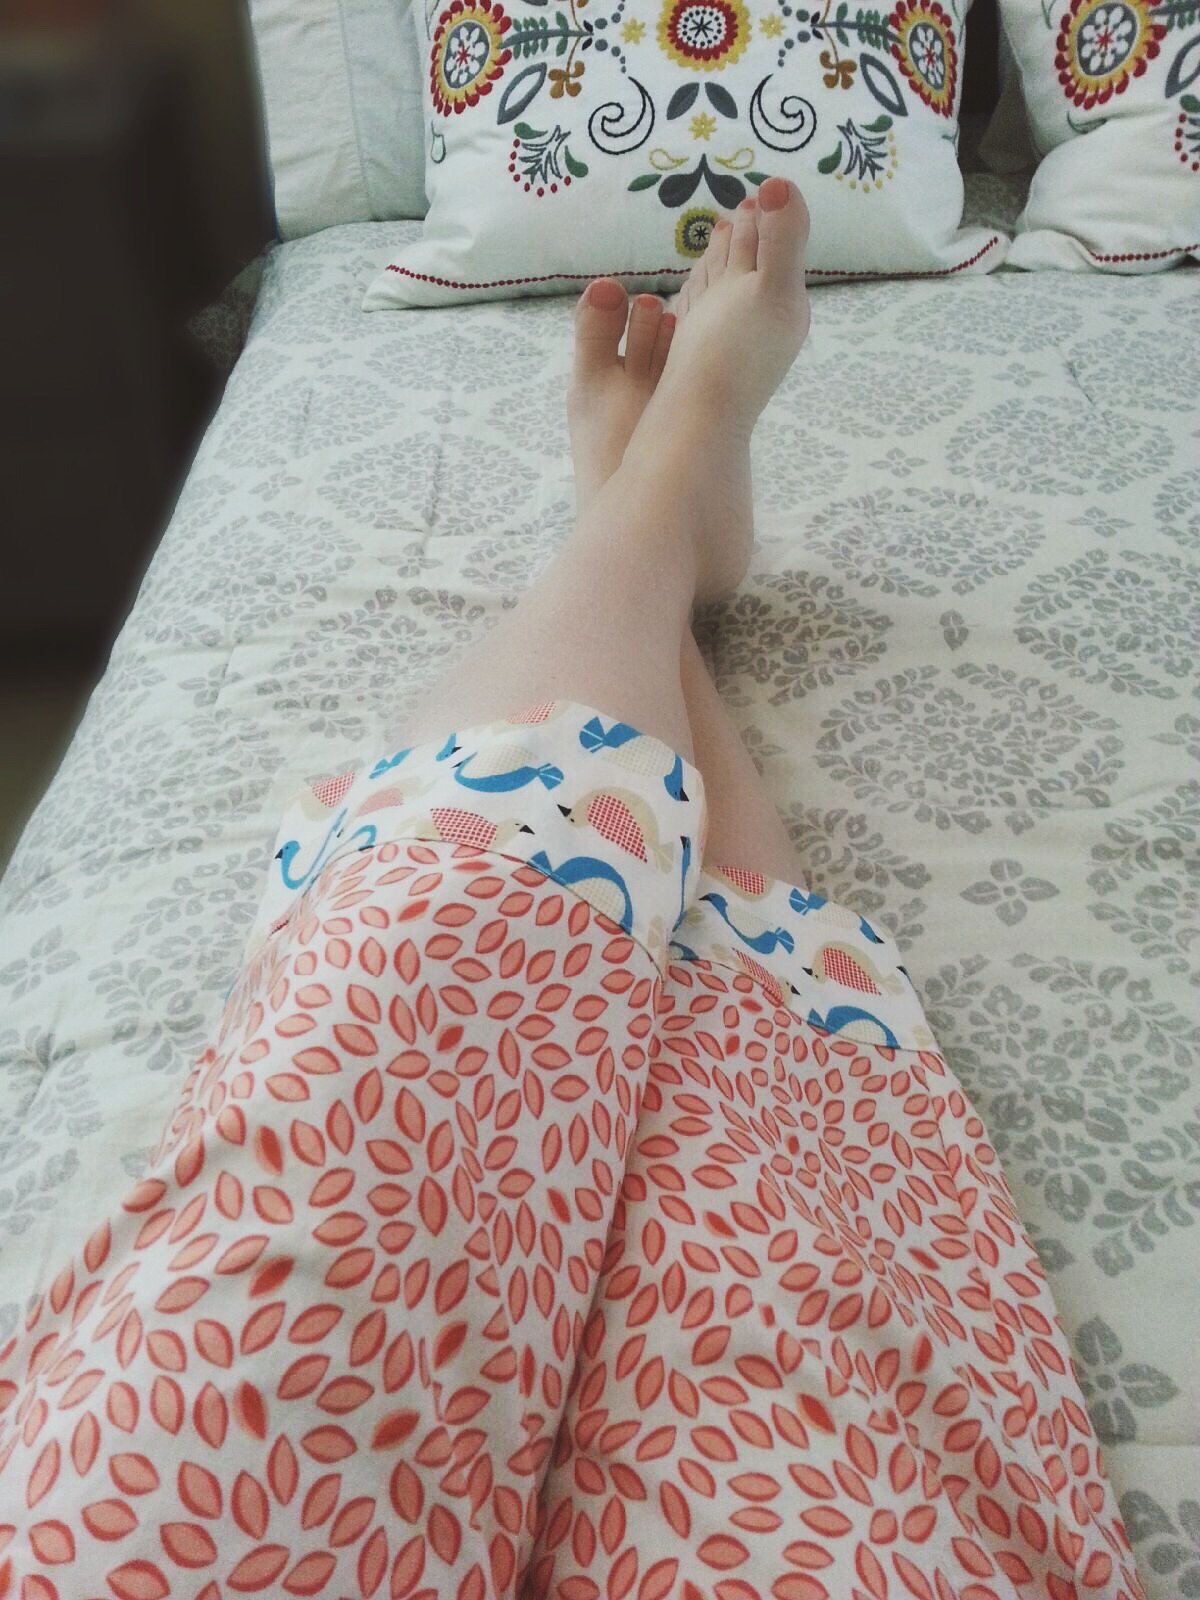
Pajama Pant Cuff
Disclosure: This site contains affiliate links. As an Amazon Associate, I earn from qualifying purchases. Clicking on links, and purchasing products, may result in the seller paying us compensation - at no extra cost to you. Affiliate links are in green.
Pajama Pant Series:
Lesson 1: Take measurements and draw a pattern based on measurements.
Lesson 2: Take an existing pair of pajama pants and turn them into a custom pattern.
Lesson 3: Sew your new pants!
Lesson 4: Add an adorable cuff to capri or full length pants.
Now that you have created your pattern and stitched together your new pants (lessons 1, 2, and 3), you are ready to add a decorative cuff to the bottom of the pant legs.
Sewing cuffs is quick and easy, and our method for attachment creates a nice finish, inside and out. This is a wonderful use of left-over scraps.
My Method
I create the cuff first, then stitch it to the pant leg. This way, the cuff is finished nicely inside and out. In other words, if you flip up the bottom of the pan leg, you do not see a seam running to the bottom of the leg. You see a nicely finished cuff on the inside of the leg. This is proper construction, rather than the “quick and easy” method. In that method, the cuff is attached to the bottom of the pant leg before the pant front is stitched to the pant back. The outer seams and inseam are then stitched. The seams run all the way to the bottom of the leg and can be seen if the outer edge of the leg is turned up. That may not be important to some people, but if I take the time to sew I want it done correctly. That is one of the many benefits of sewing.
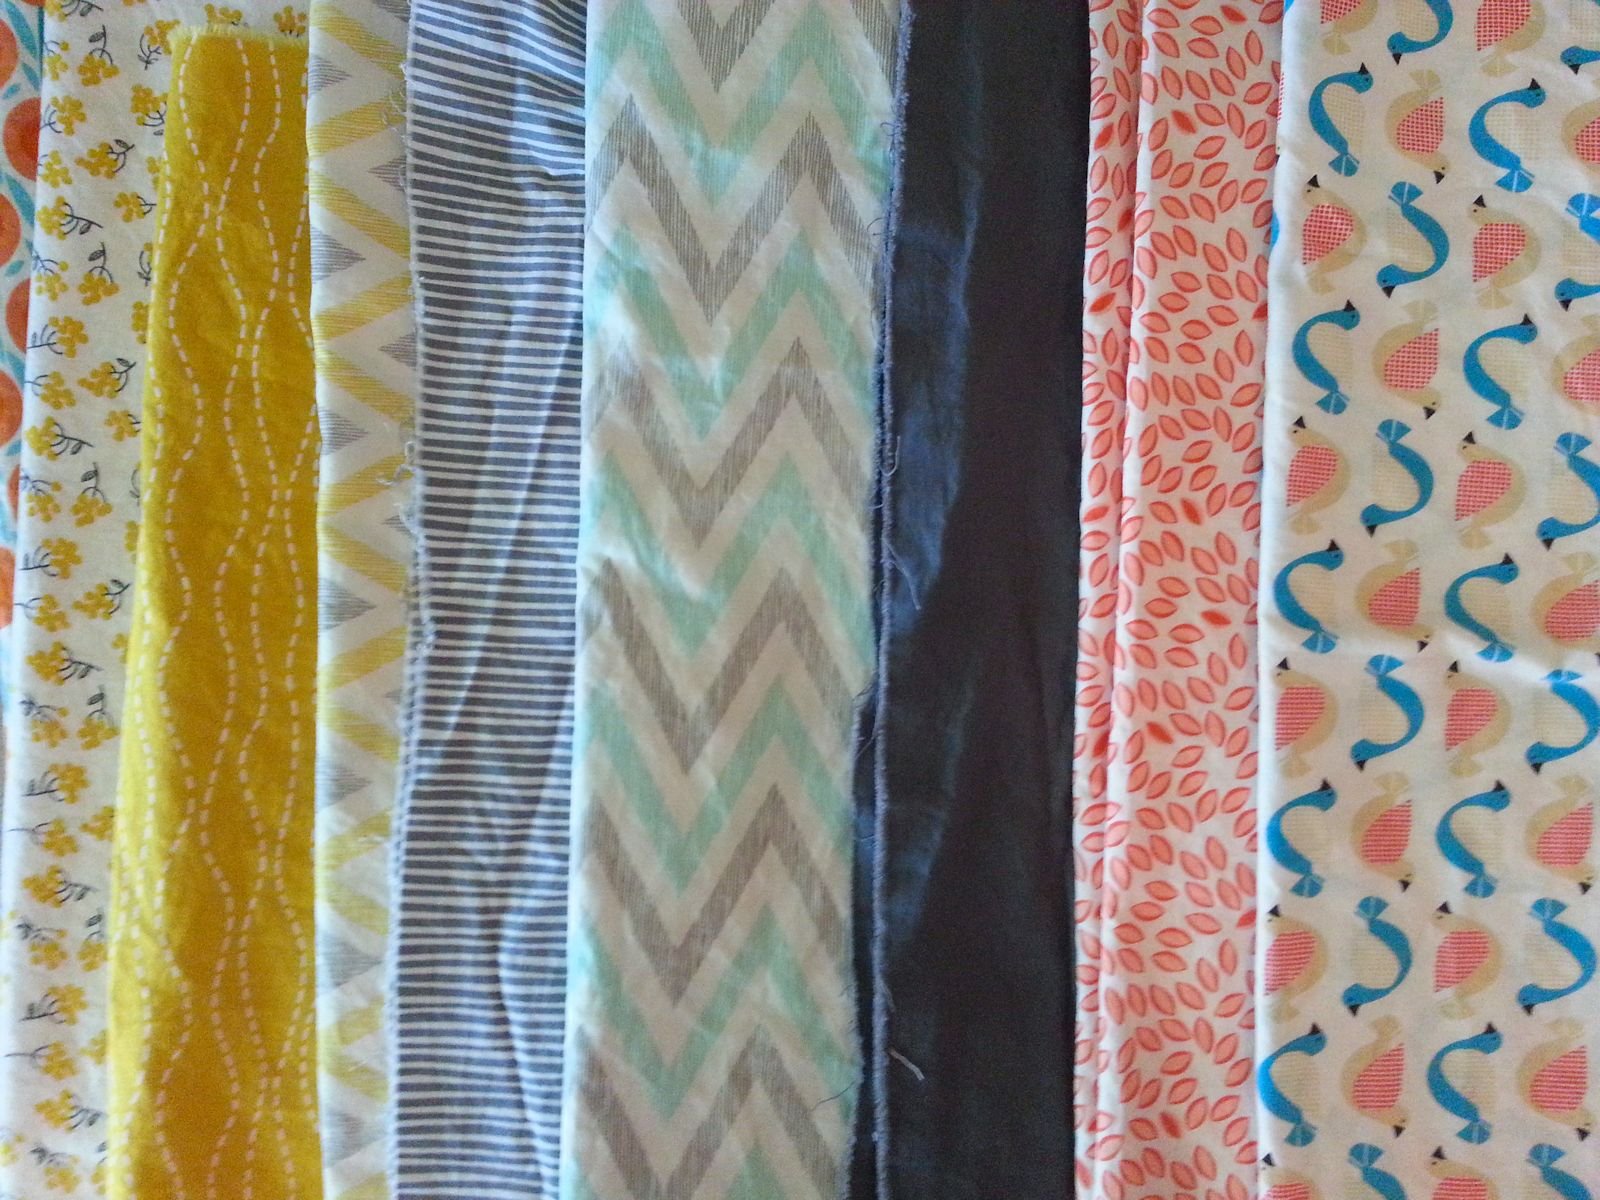
Choose Fabric
Use an adorable, color coordinated print, or a bold contrast. Mix and match fabric pattern designs, or use solids with pattern prints.
Set out fabrics that you think will work together as pajama pant and cuff. Combinations that are color coordinated work well; contrast fabric also works. Go bold, pastel, solid, or mixed print. After laying out my fabrics, I chose two prints that were color coordinated (the two on the far right, bottom photo). The cuff print was a larger pattern, which set off the cuff from the pant leg.
REMEMBER TO PREWASH YOUR FABRIC. Wash and dry fabric before using. Iron as needed. This pre-shrinks the fabric.
If you are making pajamas for children, be sure to follow safety guidelines regarding flammability.
Prewash Fabric
Wash and dry fabric before using. Iron as needed. This pre-shrinks the fabric.
If you are making pajamas for children, be sure to follow safety guidelines regarding flammability.
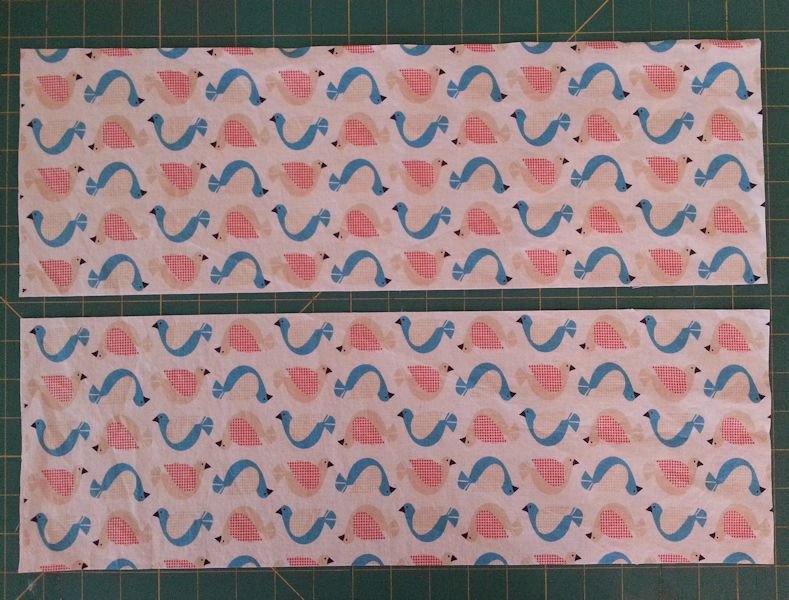
Cut Cuff Fabric
Measure the bottom edge of the pant leg. Multiply it by 2, then add 1/2" for seam allowances. This will be the length to cut the fabric. Note: my fabric had a horizontal print, so I had to be very careful to cut the fabric straight. The finished cuff will be the lower 3" of the pant leg. It is double sided (inside and outside pant leg), plus there are seam allowances. Therefore, it is cut 6.5" in height.
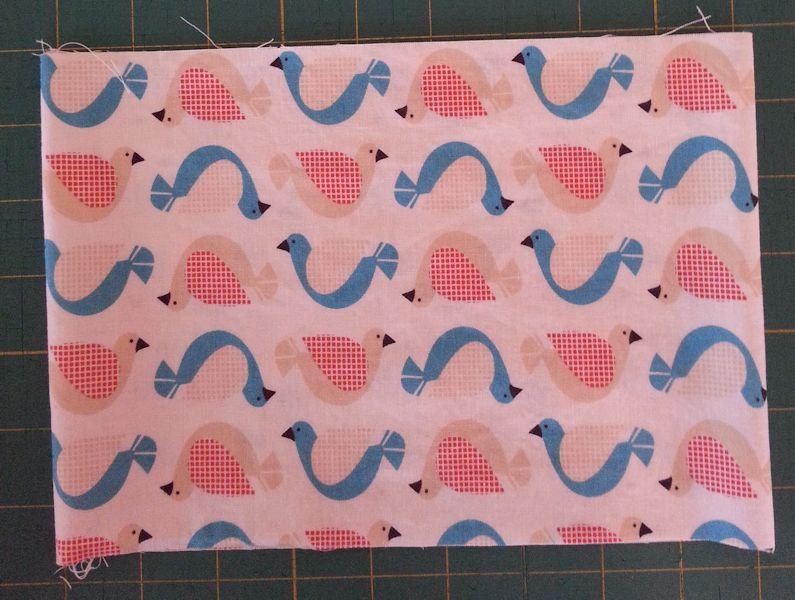
Create Cuff
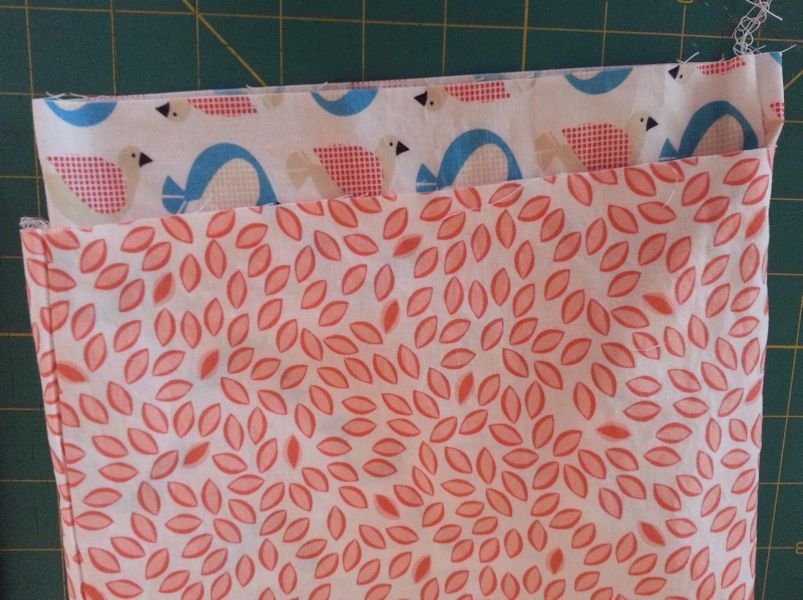
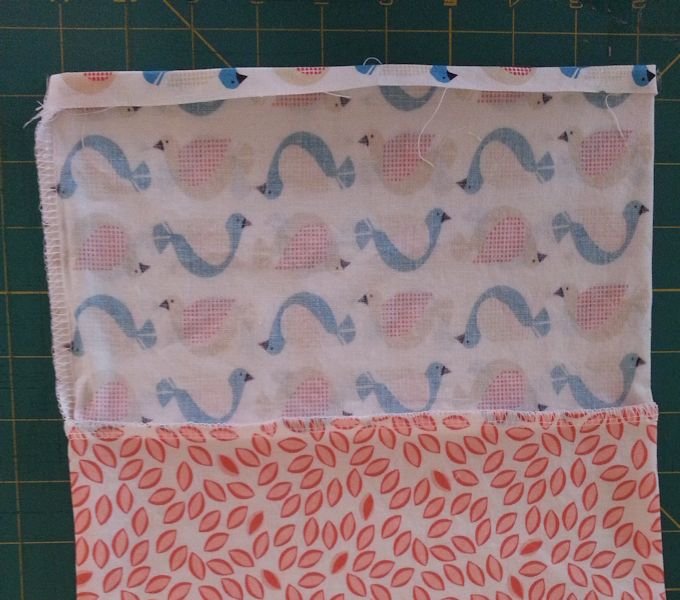
Fold the cuff fabric right sides together, lining up the short ends. Stitch across the short end using a 1/4" seam. Turn the cuff right side out and press. The photo on the left, below, shows the fabric laid out for 2 cuffs. The photo on the right shows the finished cuff.
Turn Pants & Cuff RIGHT SIDE OUT
Turn pants RIGHT SIDE OUT. Turn cuff RIGHT SIDE OUT (if not already done). Place the cuff inside pant leg, aligning cuff seam with inseam. Pin cuff to pant leg. Stitch cuff to pant leg, using a 1/4" seam.
Pull cuff out of pant leg and press open.
Turn the bottom of the cuff under 1/4” and press.
Turn Cuff Up And Pin
With the pants still RIGHT SIDE OUT, fold the cuff UP to the outside so that hem edge of cuff just covers seam allowance where the cuff was stitched to the pant leg. Pin into place.
Stitch Around Cuff
Top stitch all the way around the cuff edge (the pinned edge), close to the edge.

Beautifully Finished Inside & Out!
The photo below shows the pant leg turned INSIDE OUT. The cuff is nicely finished on the inside.

Go to our free sewing book - currently still on our CraftAndFabricLinks site - to learn how to add pockets. We will be adding our free sewing book to this site eventually. Go to Sewing Lessons for more free lessons. Your new pattern can be turned into an entire wardrobe of pants and pajama pant patterns!
Article by: Christina Sherrod
Sewing Lessons


Free Craft Projects


Set of 4 gift bags from one yard of fabric. Accessory or gift. 3 sizes plus a wine bag. Super easy - beginning sewing project.