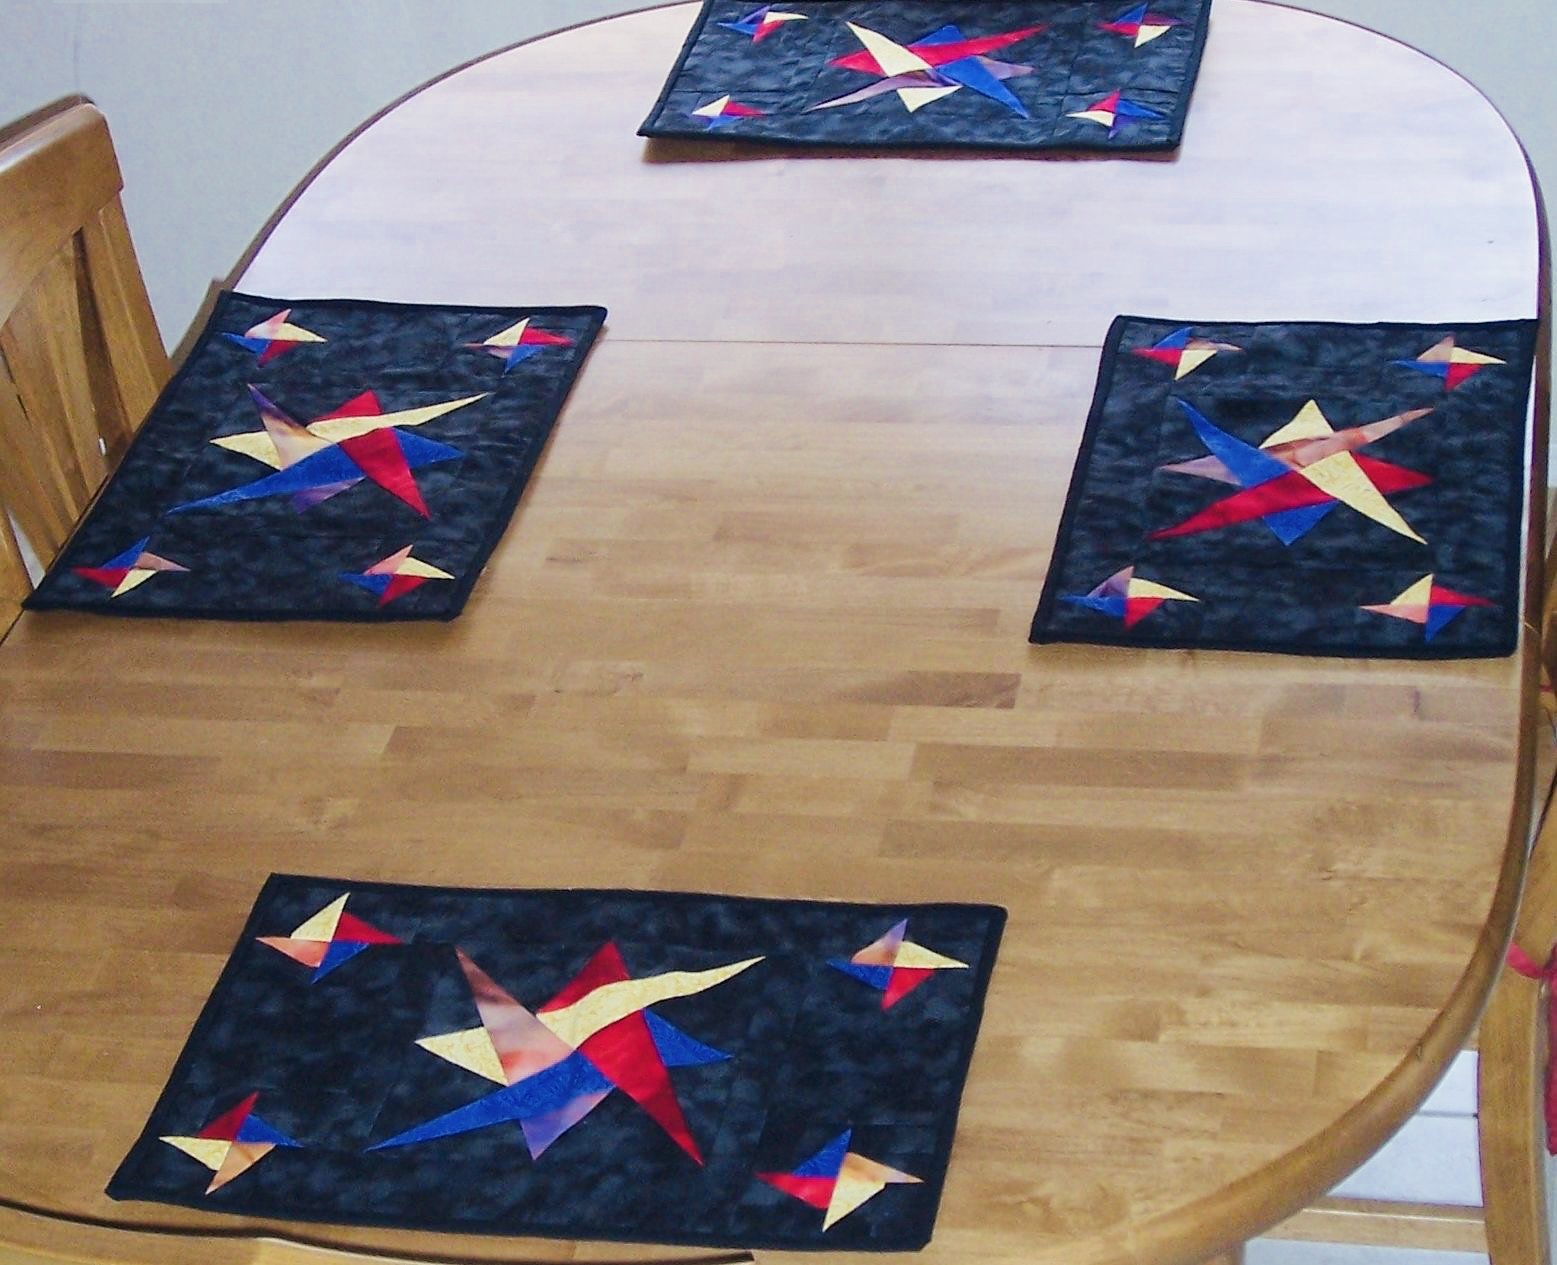
Laced Star Placemat

DIY Projects -> sewing -> kitchen
Learn two different star blocks when creating this placemat.
Disclosure: This site contains affiliate links. As an Amazon Associate, I earn from qualifying purchases. Clicking on links, and purchasing products, may result in the seller paying us compensation - at no extra cost to you. Affiliate links are in green.
Also see:
Articles & Tips
Crafts & Decor Projects
Quilt Patterns & Lessons
Home Improvement
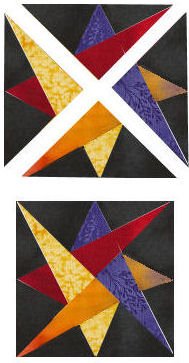
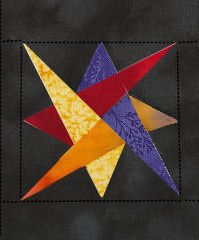
Beautiful Laced Star Placemat With Spinning Star Corners
Sewing Points
Familiarize yourself with sewing "points" before making this block (two triangles stitched together create the points). It is not difficult to create this block once you learn how to make "perfect points". Notice that the sharp ends of the points come to the edges of the finished block (when the blocks are sewn to connecting fabric pieces). Visit our free quilt lessons pages for more information.
Placemat Size
12.5” x 21”
Other
thread to match background of fabric
large sewing ruler (optional but nice to have)
scissors or rotary cutter / cutting mat
pins
quilter's square (for squaring down)
Soft Padding
This project uses Fusible Fleece. This provides nice padding for the placemats. I often use fusible fleece for this type of project.
SUPPLIES - 4 Placemats
2 yards background fabric (we used black blender) - this allows extra for "errors"
1/8 yard each of four contrast colors (we used yellow, red, purple and orange/purple mix)
1 1/4 yard backing 1 1/14 yard Batting or felt or fusible fleece
1 1/4 yard of 45" wide, or enough for 6 placemats each measuring 12.5" x 21" OR felt or fleece
TIP: Fusible fleece or batting makes layering your placemats quick and easy. Just fuse to your fabric top, then add the backing.
NOTE: Fusible fleece adds a nice padding. It noes NOT provide insulation. If you need insulation against heat or cold, use cotton batting and Insul-Bright.
binding fabric (1.25" wide strips): each placemat needs approximately 70" of binding (can use leftover pieces of background fabric)
Colorful Thread for top stitching and embellishment (optional) and thread to match background
Pattern
NOTE: Our patterns download as pdf files. If not printed correctly, they may end up the wrong size. Make one block first to be sure you understand the process, and that the pieces fit correctly.
The patterns have the name CraftAndFabricLinks.com. That is our previous site. Same owners now at SpruceAndFjell.com - new site.
INSTRUCTIONS - use 1/4” seam allowance
Cut Background Fabric Pieces
1. Cut a strip 3.75" x w.o.f. (width of fabric). Cut a second strip 3.75" x w.o.f. Cut each strip into 2.25" pieces. You will need a total of 32 2.25" x 3.75" rectangles. Set aside for SMALL SPINNING STARS. TIP: place in labeled ziplock bag.
2. Cut a strip 2.5" x w.o.f. Repeat two more times for a total of 3 strips. Cut these strips into 1.5" pieces. You will need a total of 64 1.5" x 2.5" rectangles. Set aside for SMALL SPINNING STARS.
3. Cut a strip 4.5" x w.o.f. Cut this strip into 4.5" squares. You will need a total of 8 4.5" squares. Set aside for GENERAL BACKGROUND.
4. Cut a strip 1.5" x w.o.f. Cut a second strip 1.5" x w.o.f. Cut these strips into 8.5" rectangles. You will need a total of 8 1.5" x 8.5" rectangles. Set aside for GENERAL BACKGROUND.
5. Cut a strip 2.5" x w.o.f. Cut a second strip 2.5" x w.o.f. Cut these strips into 10.5" rectangles. You will need a total of 8 2.5" x 10.5" rectangles. Set aside for GENERAL BACKGROUND.
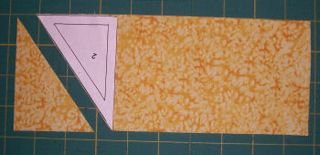
6. Using remaining fabric, cut 16 triangles from pattern piece #1. Cut 16 triangles from pattern piece #3. Save remaining fabric for binding (if you wish to use background fabric for binding). Set aside for LARGE CENTER STAR.
Create 4 Large Center Blocks
We are making four placemats so you will need 4 laced star blocks and 16 spinning stars. The laced start block measures 8.5" square. Each spinning star block measures 4.5" square.
Create Large Spinning Star Blocks (also called Laced Star or Interlaced Star)
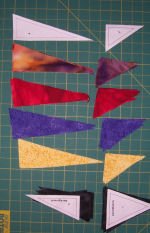
Use the pattern pieces provided to cut the following:
Piece #4: cut four of each color
Piece #2: cut four of each color
Stack The Pieces
Stack the pieces for easy handling, and to prevent mixing them up.
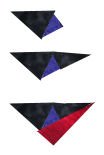
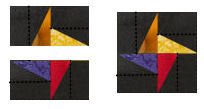
Assemble Laced Star Block
The block is assembled in four sections, as shown on Page One of the pattern (page 1 of the pdf file pattern) - also shown below. For each section, stitch piece #1 to piece #2, then piece #2 to piece #3. Then stitch on piece #4. Follow the colors shown on page one of the pattern. If you are using different colors, assign color names so keep your colors straight (i.e. red=green print if you are using green rather than red). It also might be helpful to make four copies of page one and color them in with the fabric colors you are using.
PRESSING WITH IRON
I cannot stress enough the importance of pressing between every step. Use a steam iron if possible. The back of your piece should be as neat and tidy as the front of the piece. This way, there will not be bunching and added thickness when stitching all pieces together. Normally seams are pressed toward the darker fabric. I pressed all of my pieces so that the overall piece lay as flat as possible.
For my first section, piece #1 is black, piece #2 is purple, piece #3 is black and piece #4 is red. For my second section, piece #1 is black, piece #2 is yellow, piece #3 is black and piece #4 is purple.
NOTE: pieces 1 and 3 are always background fabric.
TIPS: line up upper points of pieces 1 and 2 when stitching these pieces together. The points should also align when stitching on piece #4.
Use the template on Page One to even up the edges of each section. Don't just trim anywhere, however. Be sure seams run out to corners and you retain 1/4" seam allowances.
Stitch two sections together to create a half-block. Stitch the remaining sections together to create the corresponding half-block. Then stitch the two halves together to create the finished block. Align end points when stitchign the halves together. Your seams should all run straight from section to section and points should come out to corners with 1/4" seam allowance remaining.
Square Down
Using a Quilter’s Square, square down your blocks to 8.5"
Stitch a 1.5" x 8.5" strip (background fabric - cut as GENERAL BACKGROUND) to each side of the block. Stitch a 2.5" x 10.5" strip (background fabric - also cut as GENERAL BACKGROUND) to the top and bottom of the block. Repeat for all four large star blocks.
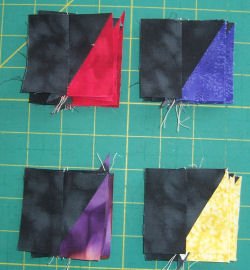
Create 16 Small Spinning Stars
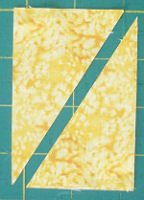
Cut 8 2.25" x 3.75" rectangles from each of your four colors. Tip: this is most easily done by cutting two strips from your remaining 1/4 yard color fabric: cut 2 3.75" strips. Then, cut the 3.75" strips into 2.25" wide pieces. See photo below.
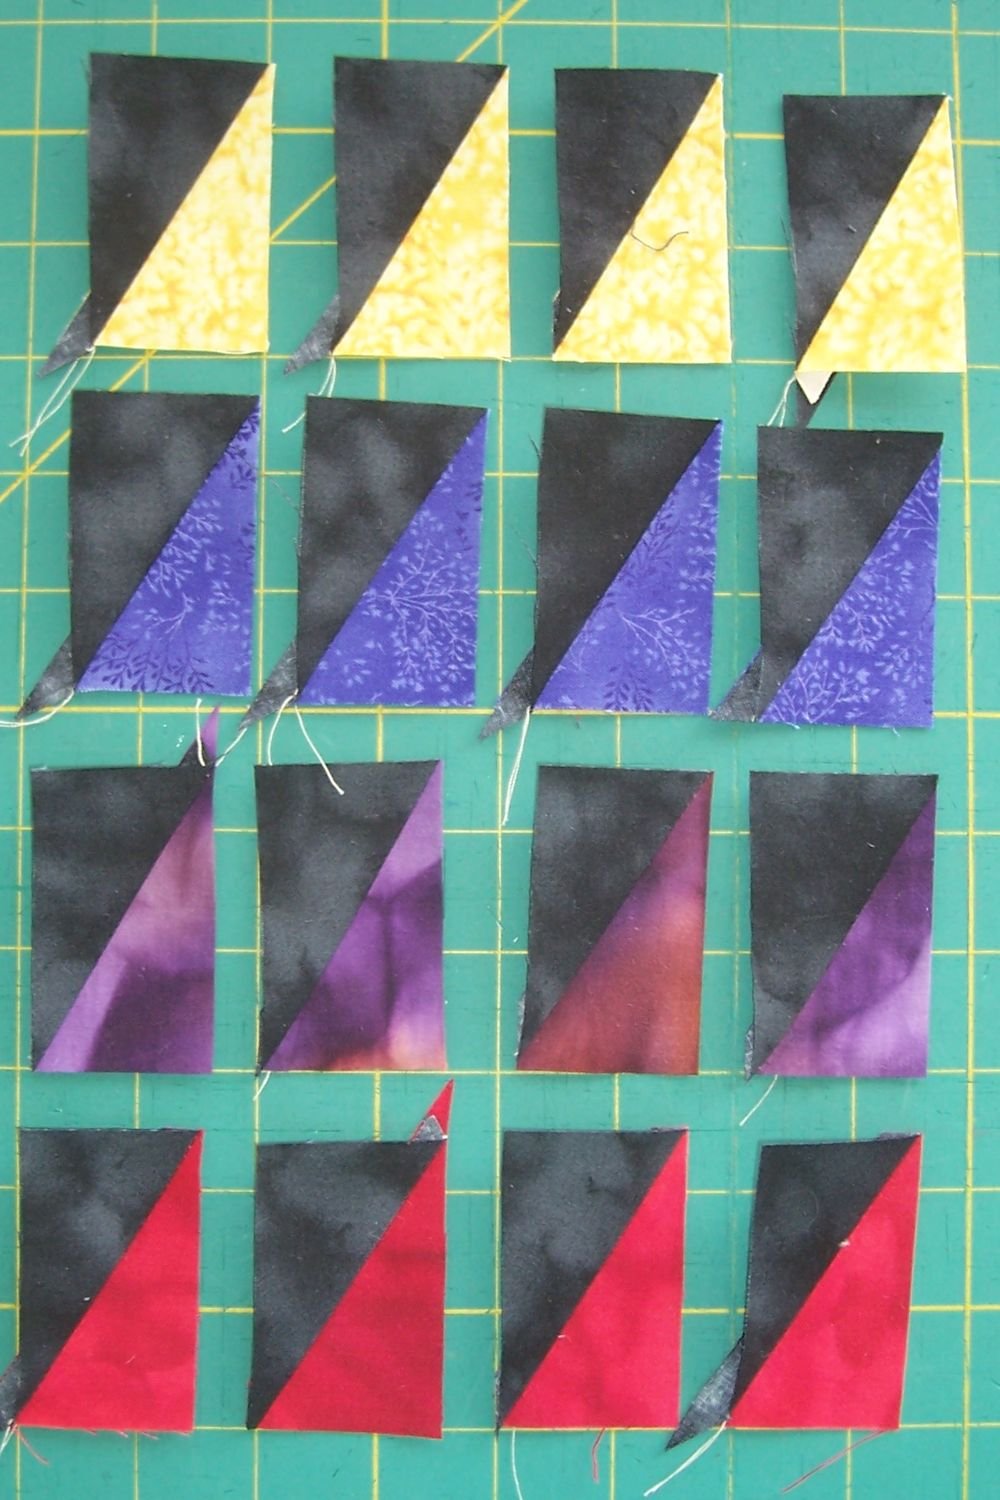
Set out your 32 2.25" x 3.75" rectangles from background fabric.
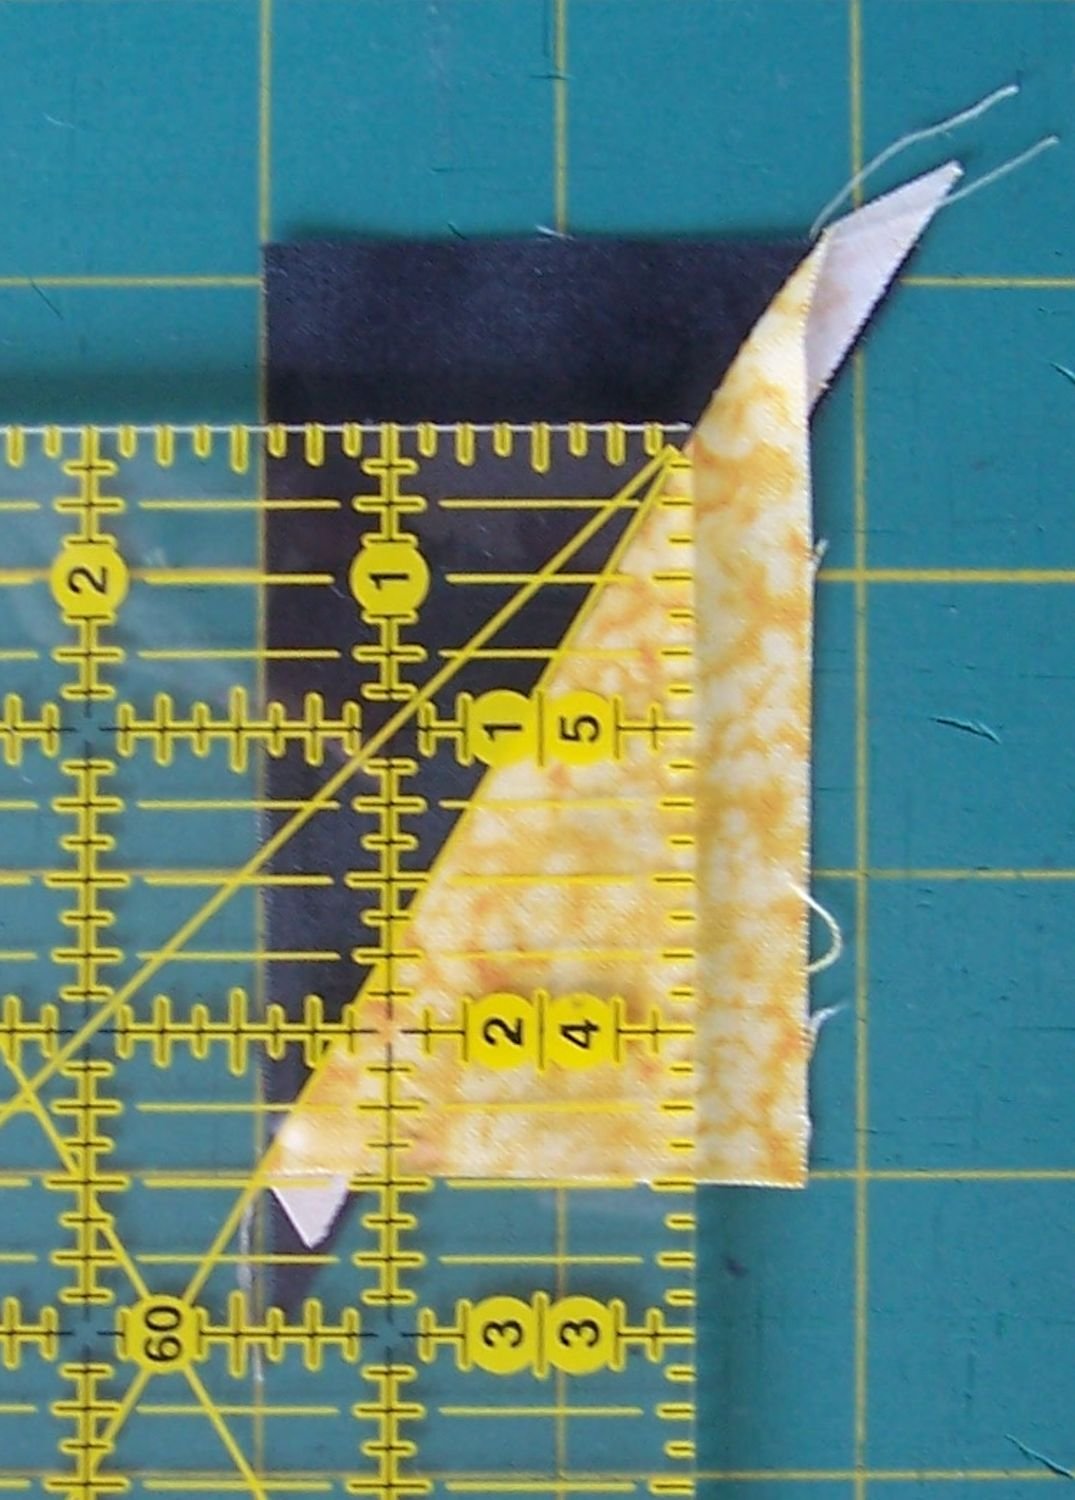
Cut each rectangle diagonally from the lower left hand corner to the upper right hand corner. Do this for both the background fabric rectangles and the color rectangles.
For each placemat, you will have 4 color triangles in each color and 16 background triangles.
Stitch a background triangle to each color triangle.
Use quilter's square to even up the rectangles. These rectangles should be squared to 1.5" x 2.5".

Set out your 64 2.5" x 1.5" rectangles from background fabric (labeled SMALL SPINNING STARS).
Stitch a background fabric rectangle to the left of each color/background rectangle (refer to photo).
Assemble spinning stars as shown. NOTE: images do not show the 1/4" seam allowances.
Each finished spinning star block should measure 4.5" x 4.5".
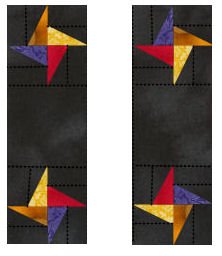
Stitch a 4.5" square of background fabric (labeled GENERAL BACKGROUND) between 2 spinning stars as shown. NOTE: I rotated my spinning stars - see photo.
Stitch a spinning start strip to each side of the large star block.
Finish The Placemats
To finish, add backing , batting, and binding.
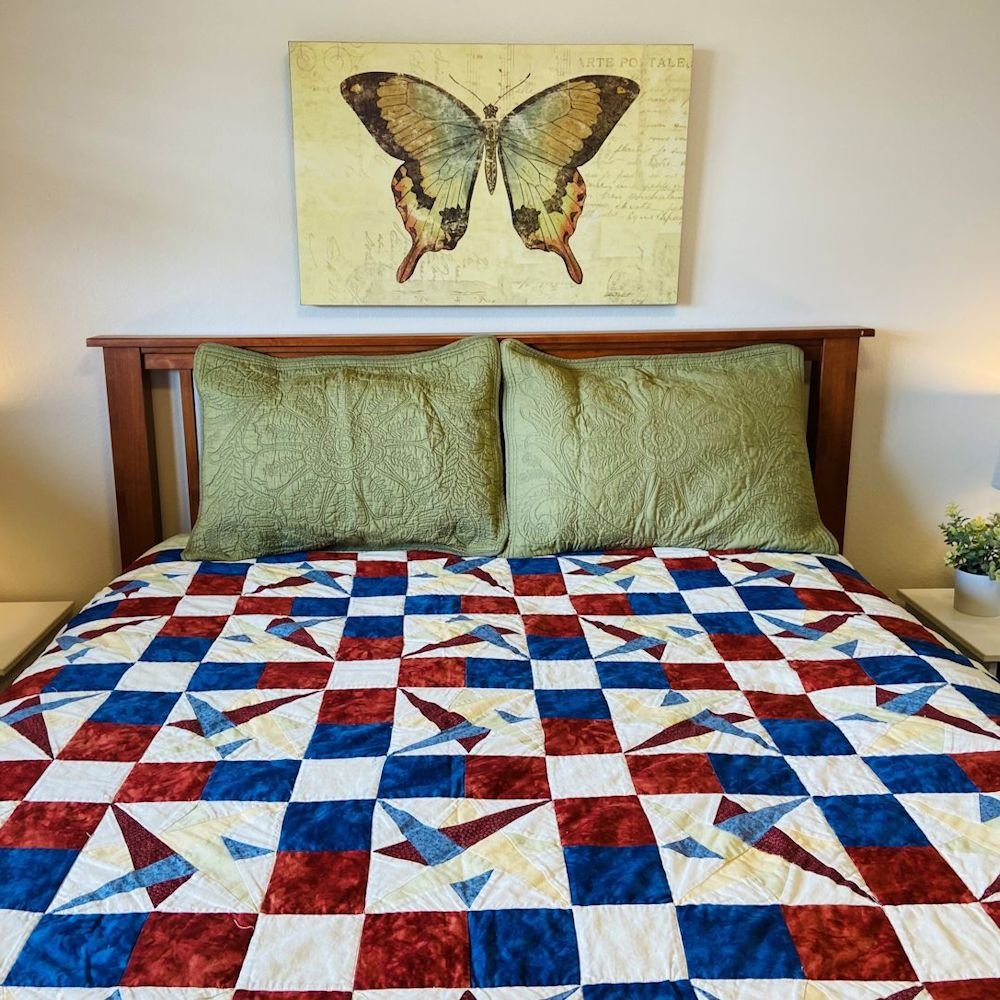
I created a Queen Quilt using this same Laced Star Block.
Pillows & Quilts


Room Decor Projects


Nicely constructed pillowcase with contrast cuff and piping trim. Cuff is nicely finished on the inside. Free sewing pattern with directions for standard, queen and king.