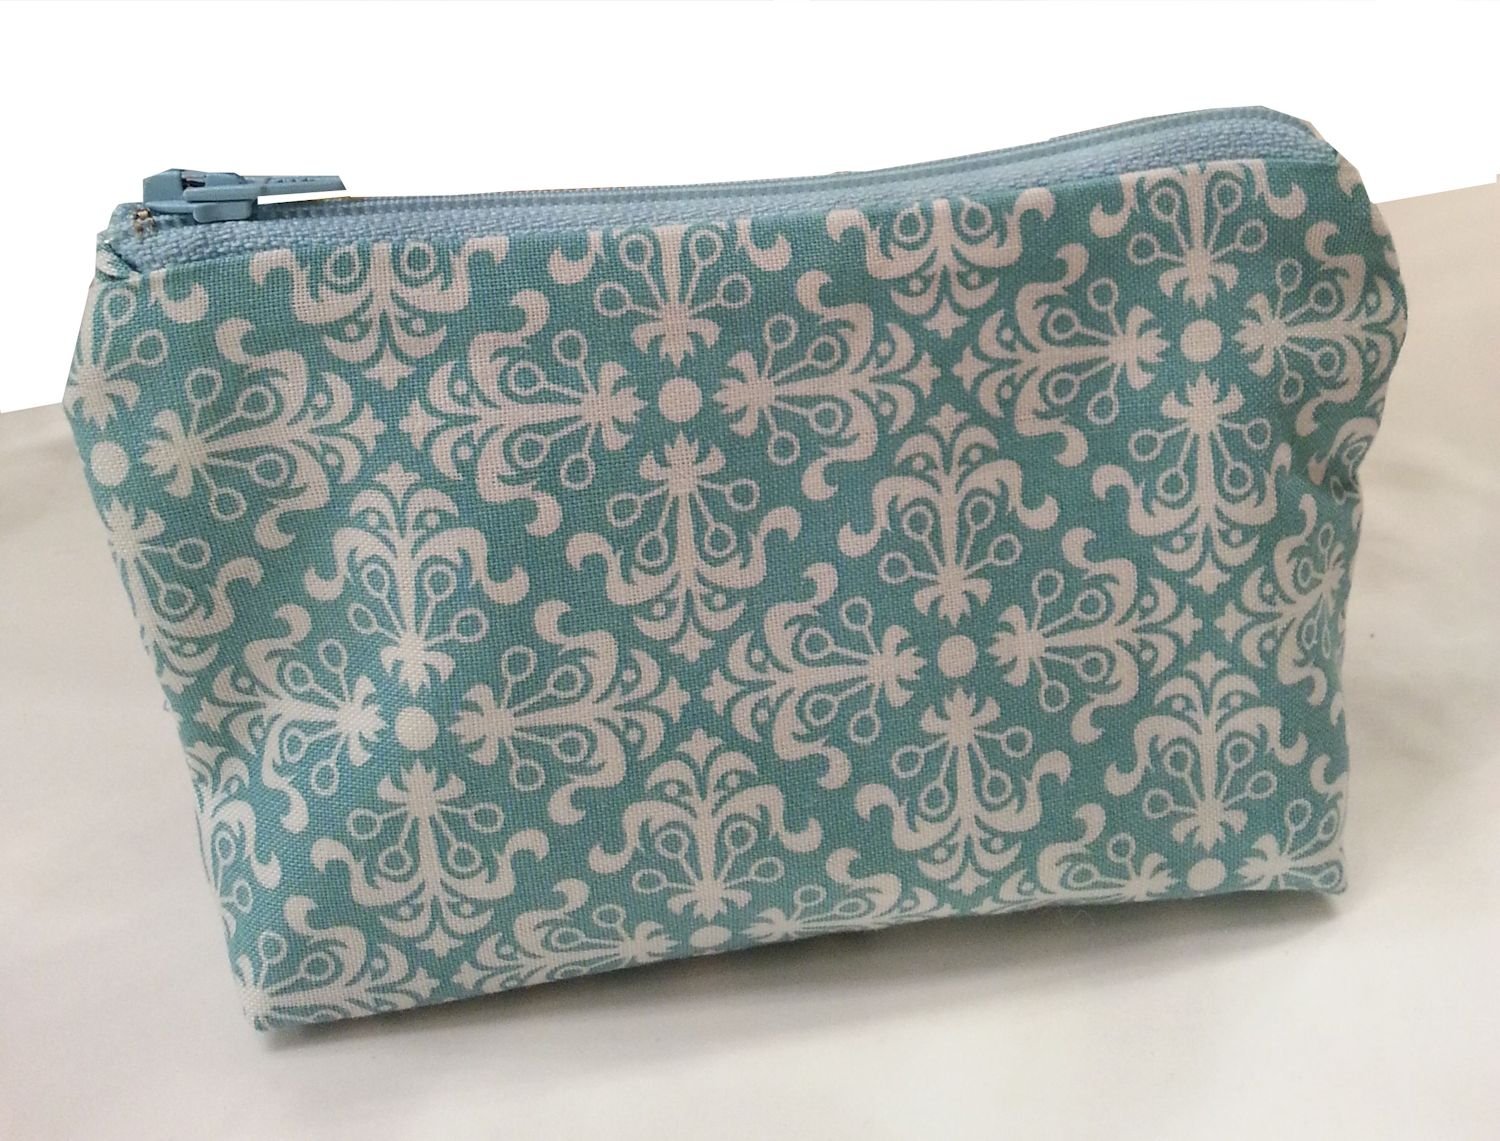
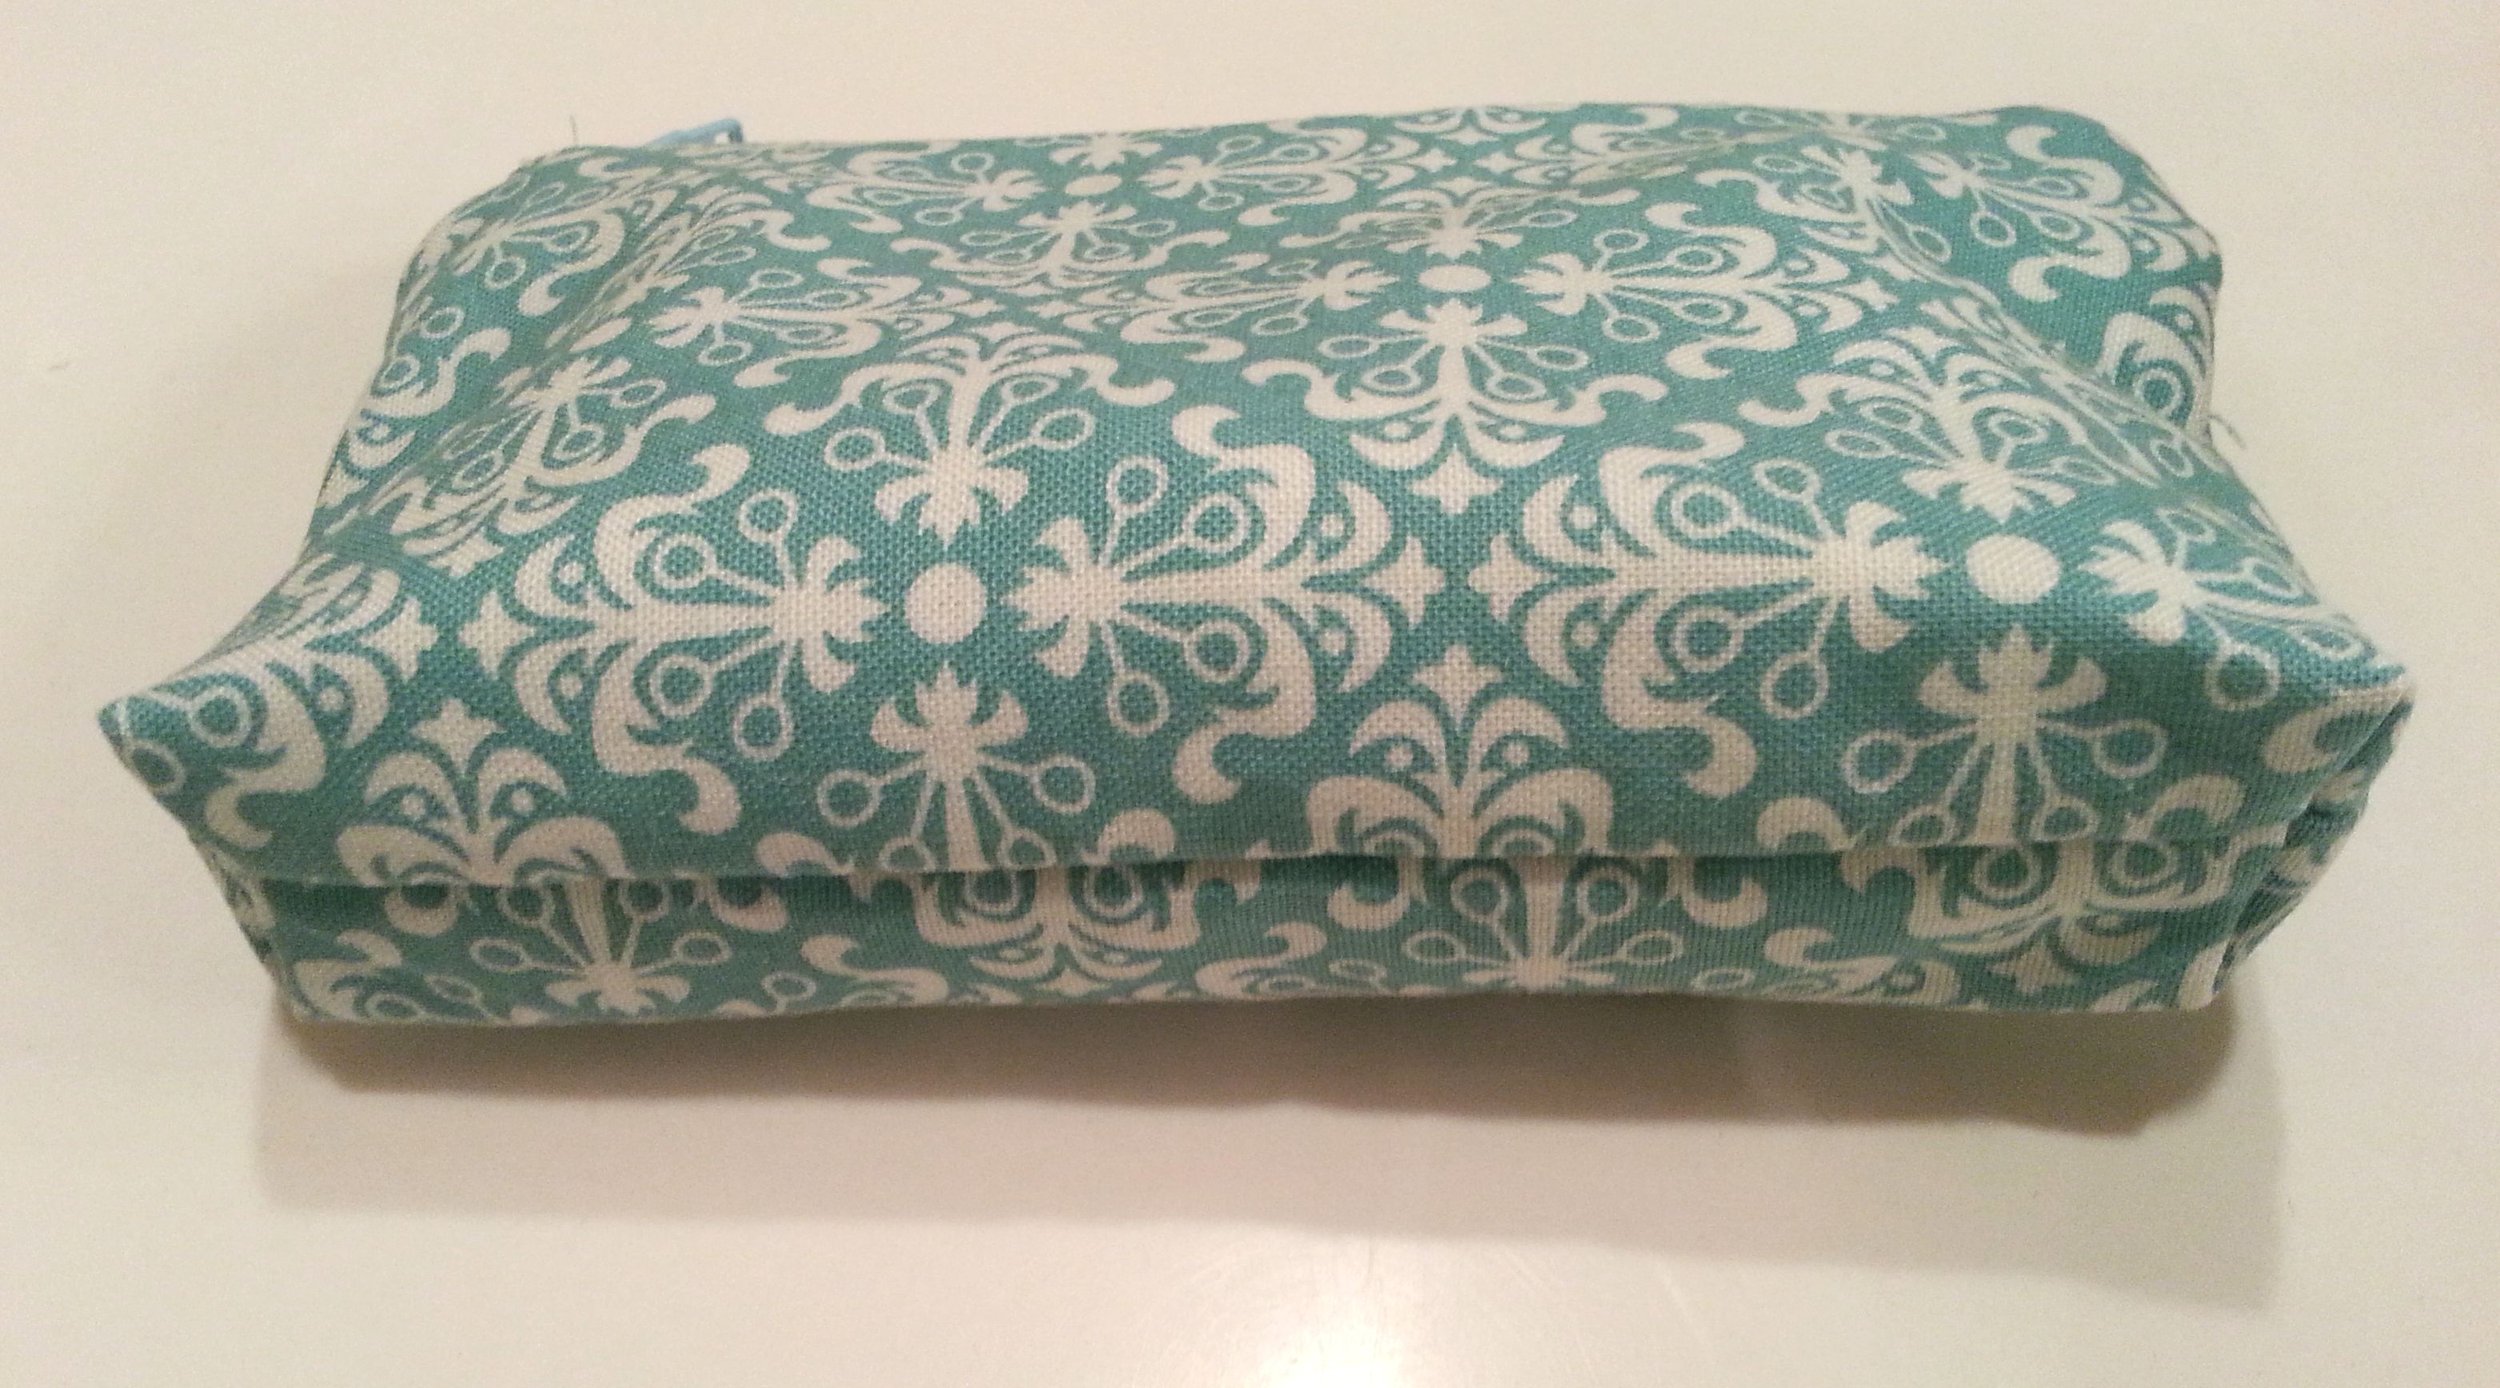
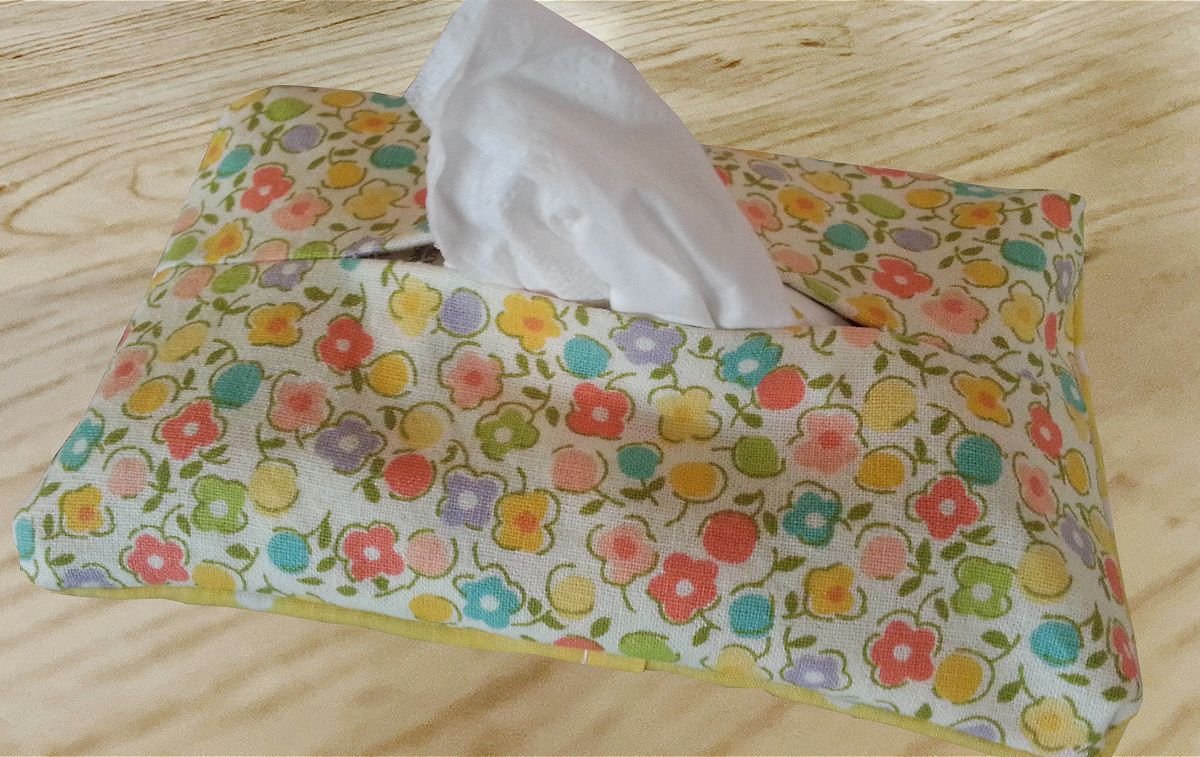
Coin Purse
DIY Projects -> sewing -> accessories
Size: approx 4” x 6” - zippered bag
Nicely shaped, mitered corners, fully lined.
Disclosure: This site contains affiliate links. As an Amazon Associate, I earn from qualifying purchases. Clicking on links, and purchasing products, may result in the seller paying us compensation - at no extra cost to you. Affiliate links are in green.
Also see:
lifestyle blog
Craft & Decor Projects
Accessory Patterns
Free Sewing Lessons
Clever Design
This clever design creates a fully lined, zippered coin purse. Quick and easy to make; however some zipper installation skill is necessary. Use a fat quarter for the outer shell. Fusible fleece gives the coin purse just the right amount of stiffness. Mitered corners create a nice flat bottom for the purse, and provide a roomier interior.
The purse can be made any size. The directions on this tutorial create the size stated above (finished approximately 4" x 6").
Purse Size
The directions for our zippered coin purse create a purse that is 4” x 6”. However, you can adjust the size to suit your needs.
SUPPLIES
General Sewing Supplies - my “must haves”
Check Amazon for prices. Affiliate links are green.
rotary cutter and cutting mat makes cutting straight lines a snap
large clear sewing ruler I can't say enough about large rulers – I use them in my home remodeling and art projects as well
straight quilting pins (optional) quilting pins are larger than regular pins, so are easier to see
spring action fabric scissors regular and micro tip – I use both; the spring action is a huge assistance when doing a lot of cutting
thread most of my thread is on large serger cones – very economical
Project Supplies
Fabric
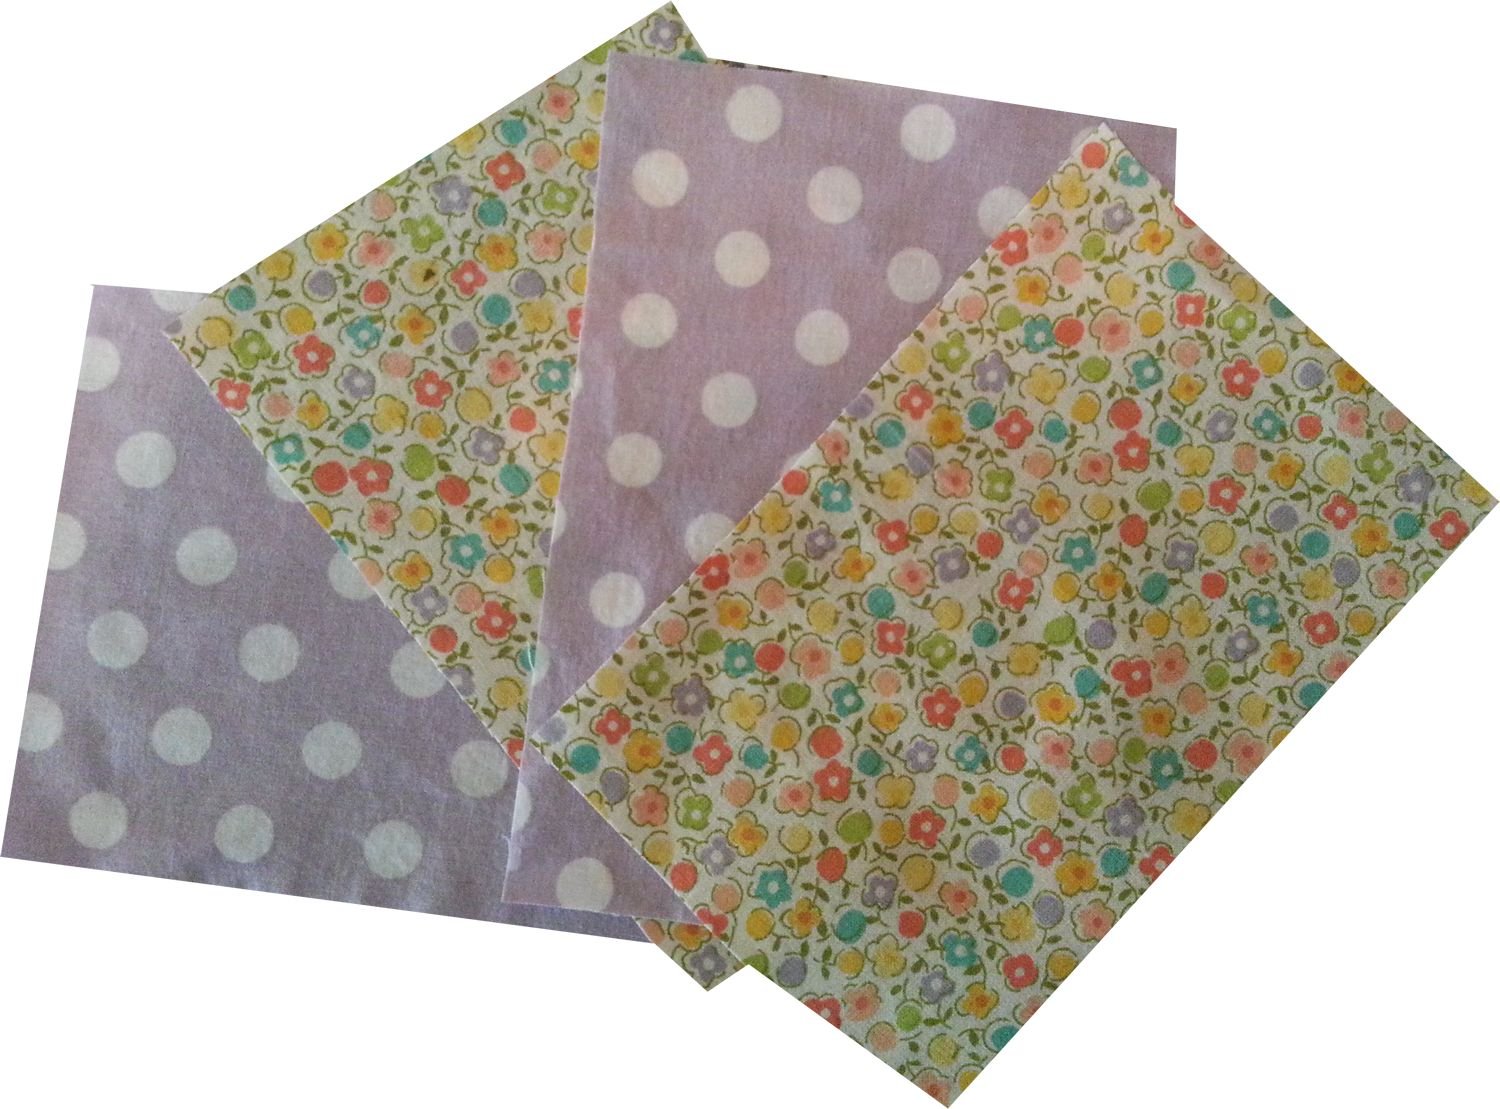
Outer Shell: 2 pieces of 4.5" x 6.5" fabric
Lining: 2 pieces of 4.5" x 6.5" fabric
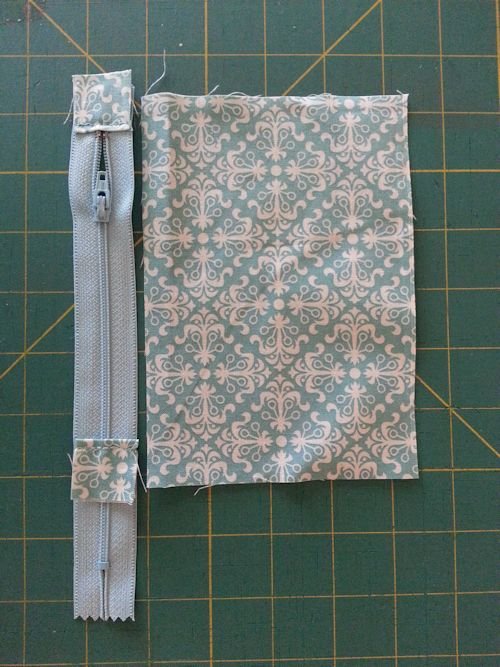
Zipper Tabs: 2 pieces of 1" x 3" fabric (same fabric as outer shell)
fusible fleece I love the padding of fusible fleece
*Fusible Fleece: 2 pieces 4" x 6" (adds body to the coin purse)
*batting can be used instead of fusible fleece; I use fusible fleece for just about everything
Zipper: at least 5 inches (can be longer - it will be trimmed) I cut the length I need from a zipper on a roll
Tip: I purchase my zipper on a roll, and cut to the length I need. This is cost effective, and allows me to get the exact length I need for a project.
INSTRUCTIONS
All seams are 1/4".
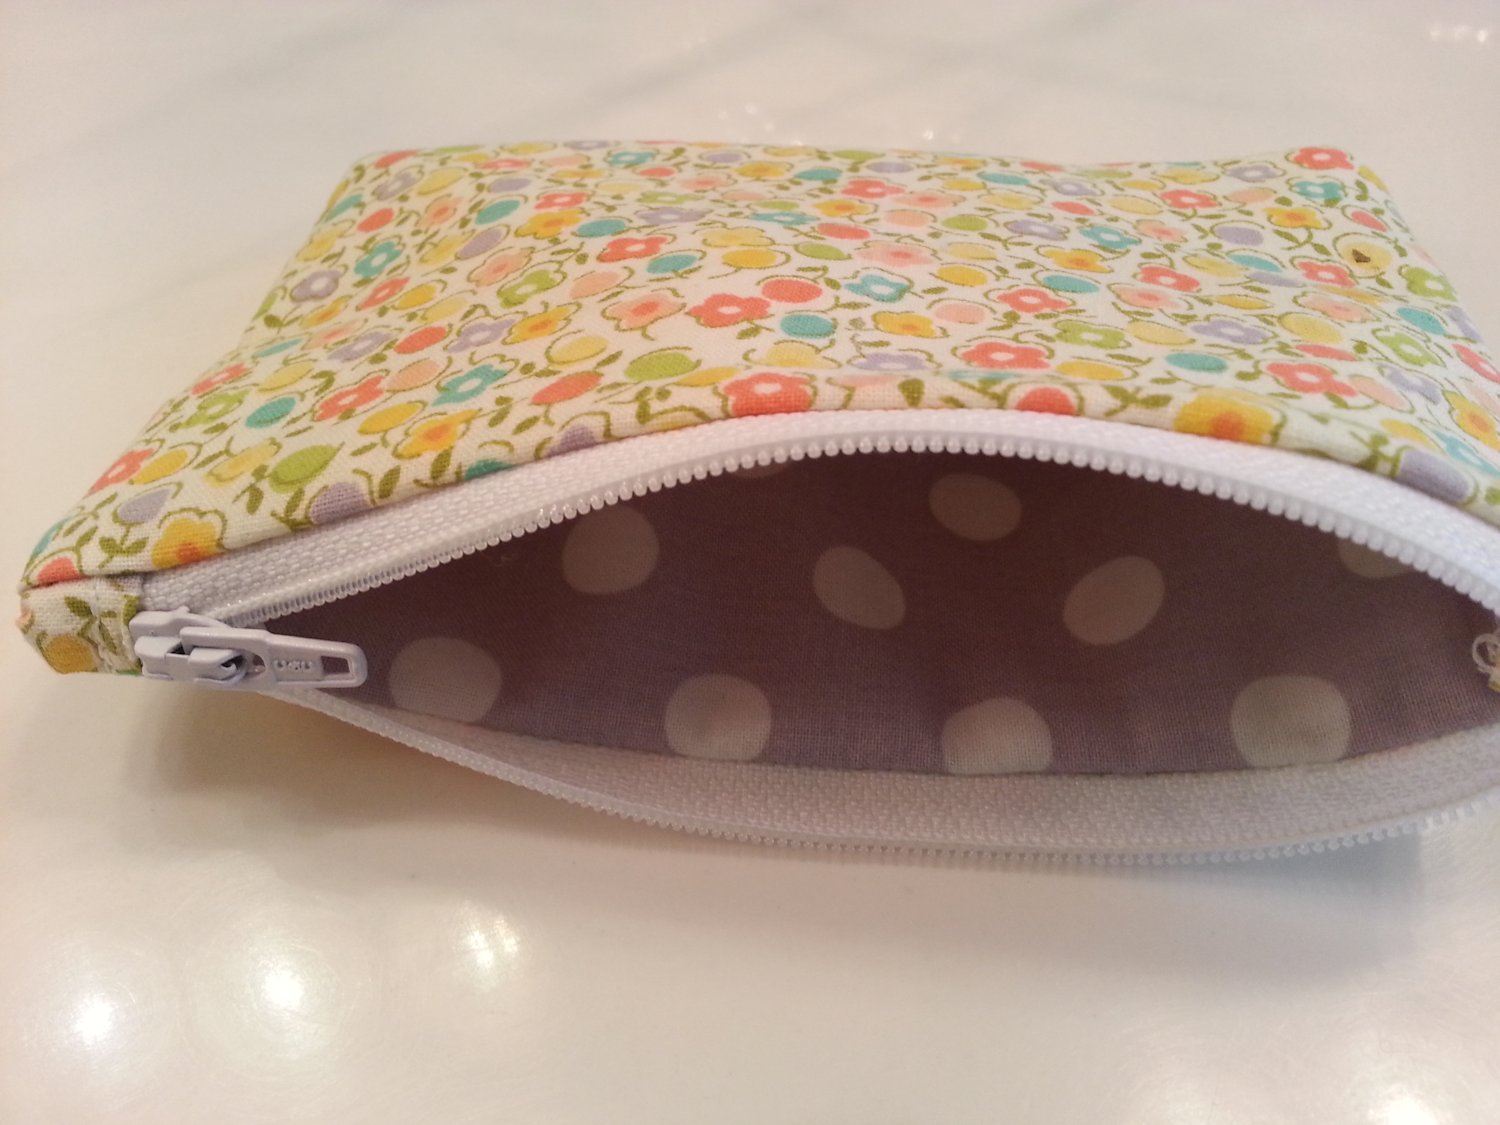
I liked my first coin purse so much that I decided to make one for my mother for Mother's Day. I chose the second set of fabrics for her purse. The purple polka dot print makes a nice contrast lining.
Click photos for larger view.
Create Zipper Piece With End Tabs
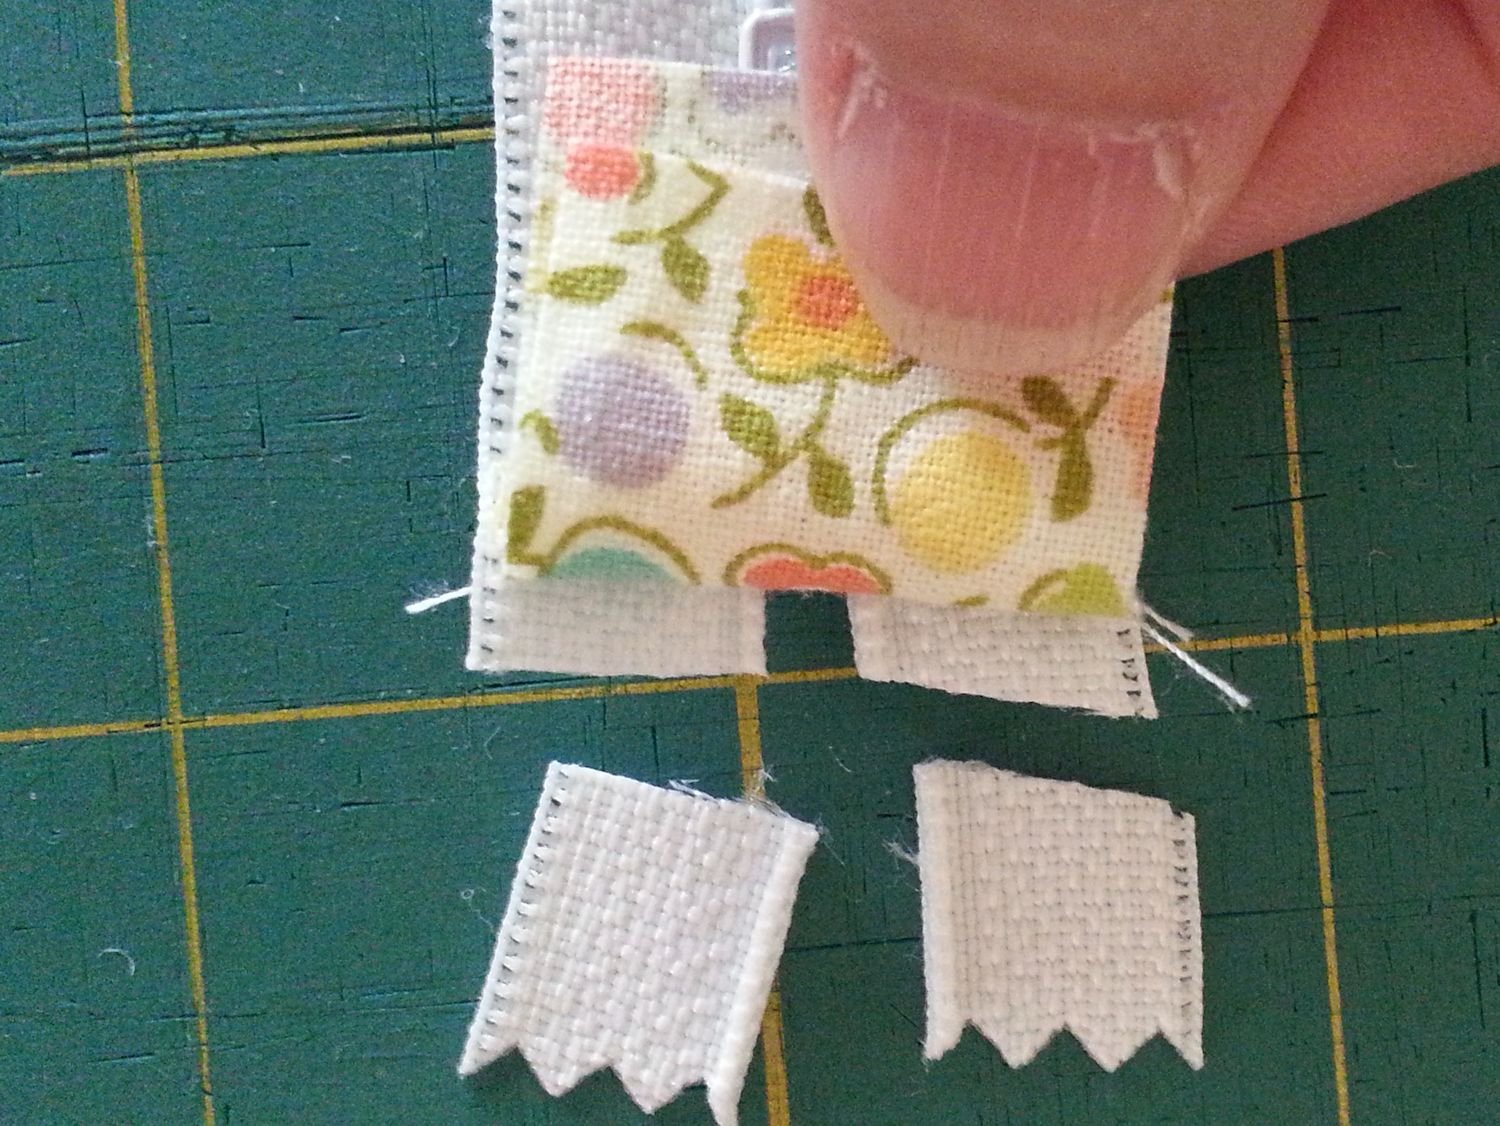
1. Fold the tab across so that it measures 1” x 1.5”, wrong sides together. Press.
2. Lay your zipper right side up. Unzip the zipper part way. Pin with the folded end toward the zipper pull. Stitch across the folded end, close to the fold. My photograph shows a shorter tab. After making a few of these purses, I decided to make the tab just a big longer. Your folded tab will be 1.5” x 1”, rather than the 1” square shown in the photo.
3. Measure 4.5" from the folded edge of the tab you just stitched. Place the second folded tab on the opposite end so that there is a 4.5" length of zipper between the two tabs. Stitch across the zipper teeth a couple of times to create a secure zipper stop.
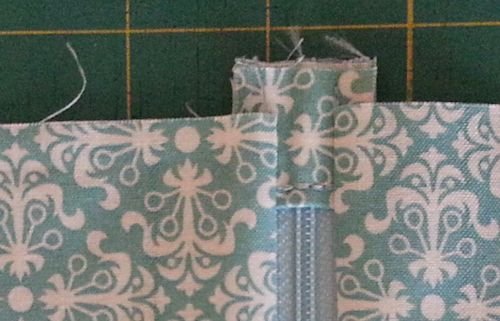
4. Trim off the zipper ends close to the fabric tab. Do this for each end of the zipper. The tab shown in the second photo below is from my second purse.
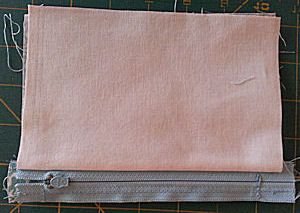
The long, vertical photo after the following two photos, shows the right side of the zipper, with both tabs stitched on, and extra length of zipper on one end that still needs to be trimmed off.

Stitch Outer Shell To Zipper Piece
1. Lay the zipper unit right side up. Lay one outer shell piece right side up. Your tabs will extend beyond the main shell piece. That is OK - we will trim it later. This step is to check to be sure the zipper falls within the length of your main shell length. It isn't crucial how long the zipper is; you just need to be sure the zipper area allows for a 1/4" seam allowance on each end. Plus I like the tab to be 1/2" when the purse is finished (sides are stitched together). You can see this best in the photo at the top of the page - the yellow floral purse. Notice the tab covers the end of the zipper approximately 1/2". I think it makes a nice finish.
2. Flip the main shell piece over (wrong side down) and line up the upper raw edge with the upper edge of the zipper piece. Pin. Stitch across the upper edge, right sides togethe, using a zipper foot. I stitch approximately half way between the edge and the zipper teeth, and I use a slightly longer stitch length. Unzip and zip as needed as you stitch across.
3. Flip the shell piece right side up. Press, being careful not to melt the zipper.
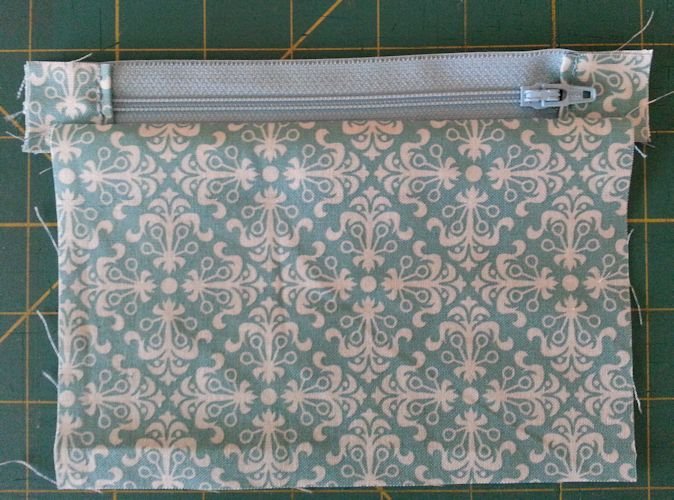
4. Repeat on the opposite side of the zipper, using the second shell piece.

Create The Lining
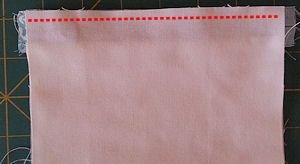
1. Lay the piece wrong side up. Fold the upper shell piece down so that both outer shell pieces are away from the zipper. The zipper piece is along the top. Pin one lining piece, right side of lining to wrong side of zipper piece, along the upper edge. Stitch across, stitching over previous stitch line. If you stitch from the zipper side you can see your previous stitch line. Stitching is enhanced in red in the photo.
Open lining piece. Press open.
2. Press both outer shell and lining open.
Repeat steps one and two for the second piece of lining on the other side of the zipper.
Attach Fusible Fleece

1. Arrange layers so one lining piece is wrong side up on your work space. All other layers are folded up out of the way.
Lay a piece of fusible fleece, adhesive side down, over the wrong side of the lining piece. Press into place following the manufacturer's instructions. Repeat with the second lining piece.
The fusible fleece can be omitted, but I like the soft padding that it provides.
Finish Your Purse
1. Unzip the zipper. Fold the purse right sides together. The zipper will be along the top of the purse and the right side of the lining will be the outside layer. Stitch the two sides and bottom, using a 1/4" seam.
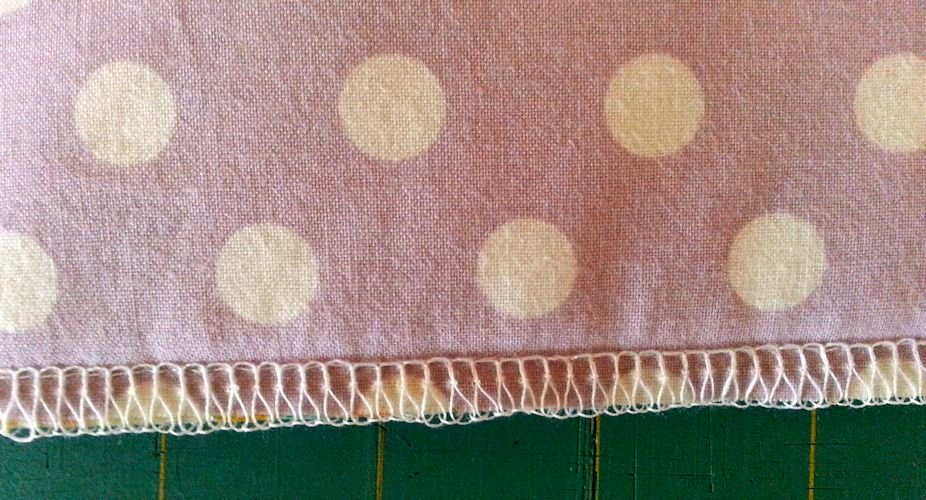
2. Finish the seams. Add seam binding or serge the seam edges.
3. Miter the corners at this point.
For directions on mitering corners, go to: Easy Tote Bag
Click the following photos for larger image on mobile devices.

Sewing Patterns


Craft & Home Decor


Home Improvement


Lifestyle Blog


Adorable, super easy stuffed cat ornament. Embroider or paint a face. Add a ribbon bow.